Synchronization of cloud data with local PC/laptop
This tutorial describes how to synchronize Libraries from your cloud with your local PC/laptop. Further it will explain how to upload and synchronize local folders with your private cloud.
Download of cloud libraries
Over the cloud webinterface it’s possible to administer your Libraries. You can created new libraries and upload data into this new created libraries. How it works is described HERE.
We suppose we have already a library structure, similar to that:
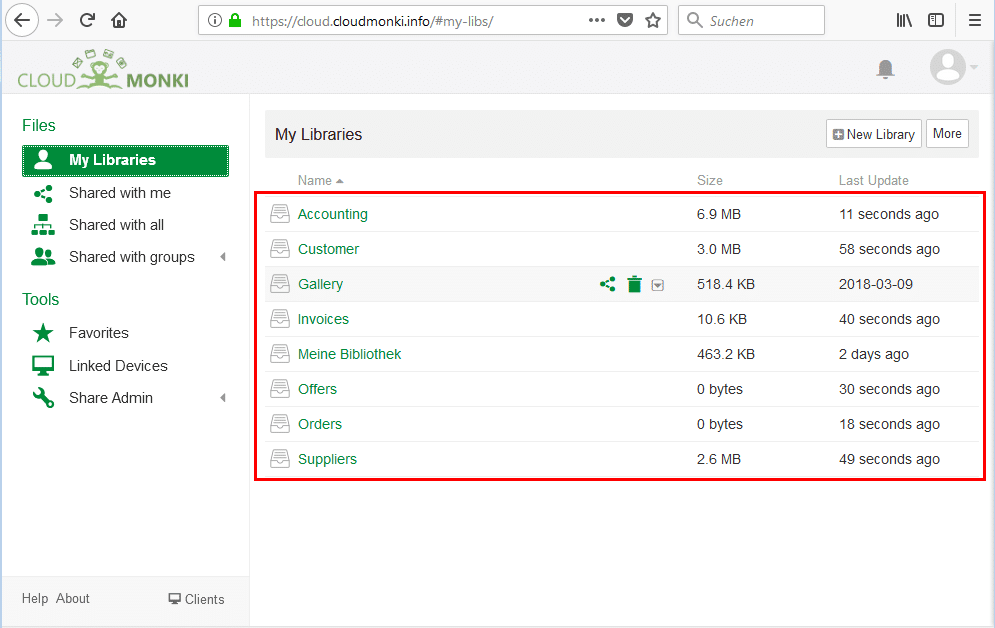
In the cloud some library already existing. Now we start synchronizing one of them with the local PC/laptop.
To start open the Seafile Synchronization Client. How this is installed on your device please read HERE.
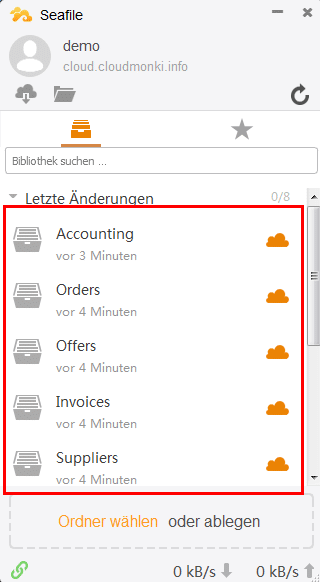
In the data section of the Seafile Client you find the same structure of libraries like in the webclient. On the right of each library you find an orange cloud icon, which tells us that no one of this libraries is synced with the local PC/laptop.
Now we synchronize one of this libraries.
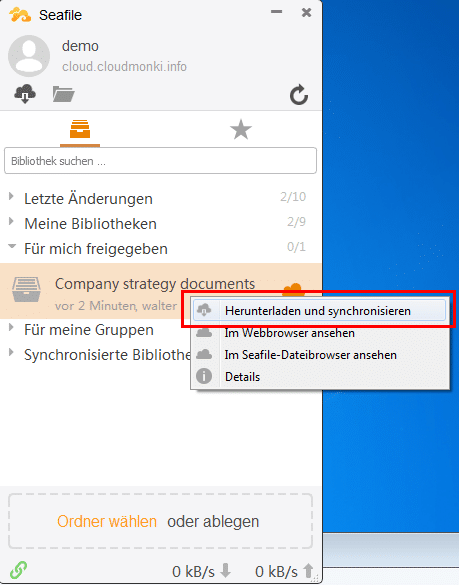
Therefore select the library, lets say “Accounting” and click right on it. It will appear following menu:
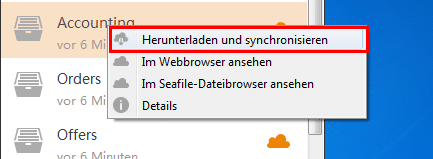
Chosse “Sync this library”.
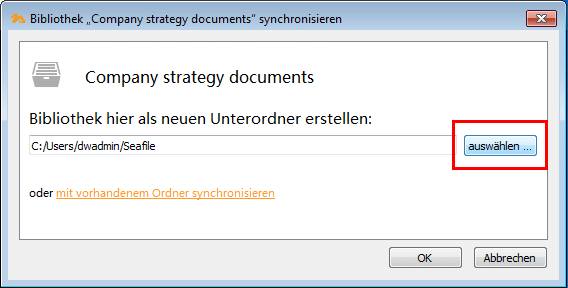
Now a popup will appear. Here you have to choose the location where the library should end up when synchronized:
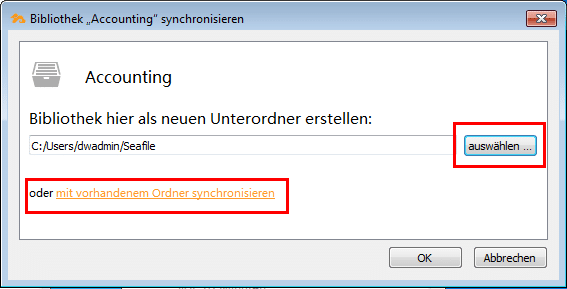
There are two options available: You can select the location where the library folder should be created (New folder with then name of the library will be created).
Second option is to select an already existing folder (Used for example when a similar folder with similar data is existing on the local PC/laptop).
Choose new folder:
Click on “Choose” and choose the path where the library folder should be created.
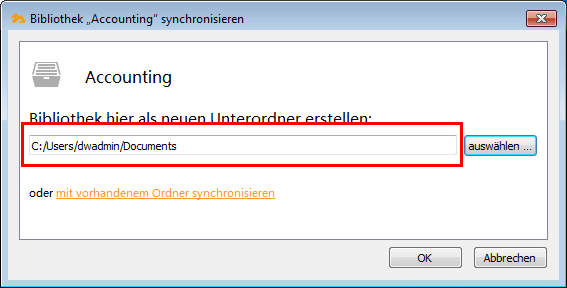
In this case the following folder will be created: C:/Users/dwadmin/Documents/Accounting. In it the entire content of the library „Accounting“ will be downloaded and synchronized.
Confirm with OK, the synchronization starts. Please wait until is finished, based on the amount of data can take some time.
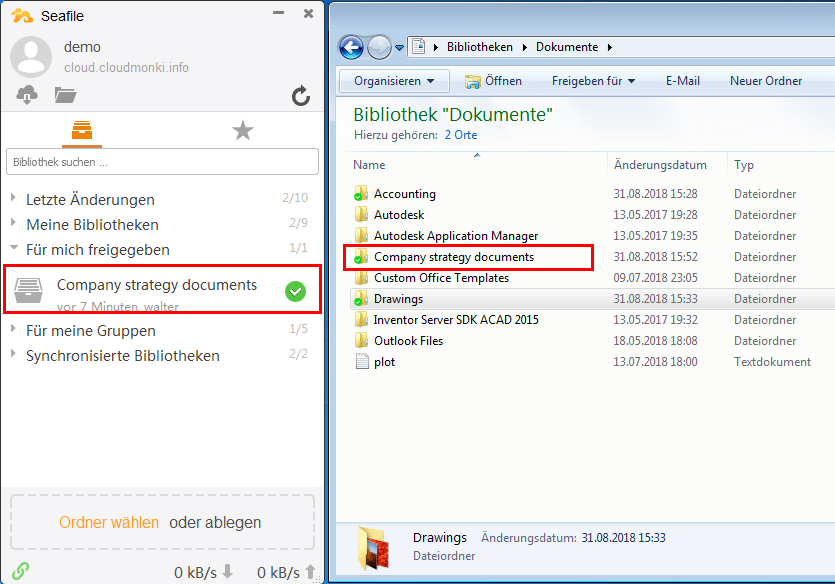
When the synchronization is over a green icon will appear next to the synchronized library. This means synchronization with local PC/laptop ended successfully.

Upload of local stored folders and creation of new libraries
It is also possible to upload and synchronize local stored folders. In this case for each folder a new library will be created in the cloud.
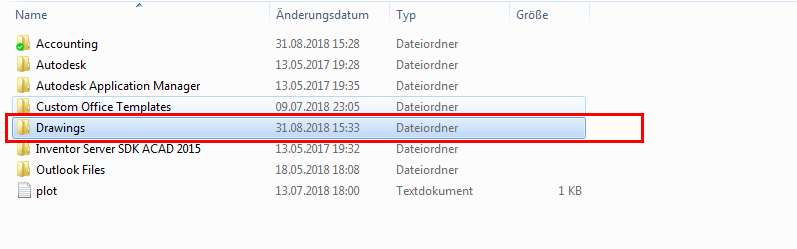
Lets assume we want to upload and synchronize the local folder „Drawings“ with our private cloud.
It is really simple, the only thing to do is to drag and drop the folder into the Seafile client.

The following popup opens:
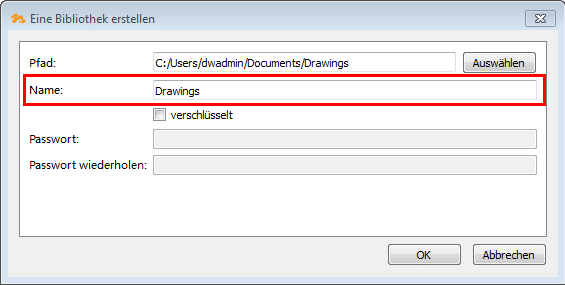
Select the name of the library which will be created in the cloud. As default the same name as the selected folder will be proposed.
Additionally you can decide to encrypt the new library. If activated you have to define a password for the the encryption. (Pay attention: Don’t forget the selected password, otherwise you will loose your data because it is not possible to decrypt the data without password).
Confirm with OK.
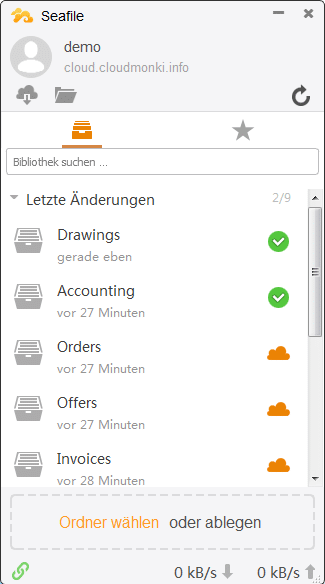
After the synchronization the new library is available in the seafile client and is marked as synchronized.
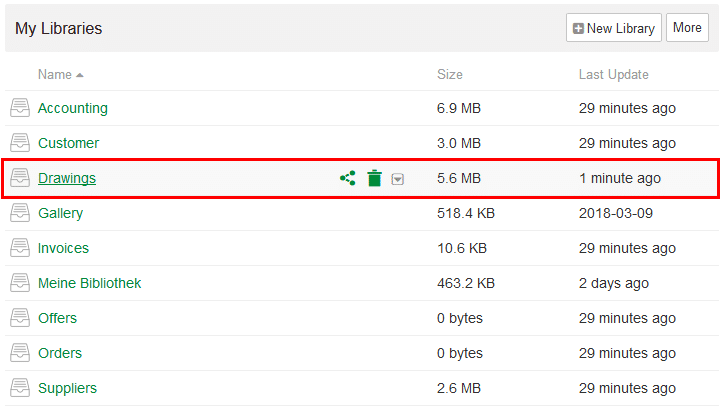
And also in the webclient the library is available.
Synchronization of shared libraries
The Cloudmonki cloud makes it possible to share libraries with other people working in the same organization. When someone of your colleagues has shared a library with you, you even can synchronize this library with your local PC/laptop.
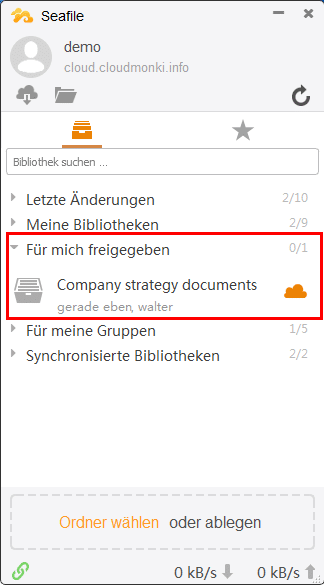
You can find this shared libraries in the section “Shared with me”.
The synchronization of this folders works in the same way as already described above.
Select library, Right click!
Choose „Sync this library“.
Click “Choose”.

Choose where the new library folder should be created.
Confirm with OK.
The shared library is now available as synchronized folder on your PC/notebook.
Synchronization of changes and new files
Notice:
- Each change on local files in synchronized folders will be synchronized with the cloud.
- All newly created files in synchronized folders will be synchronized with the cloud.
Example:
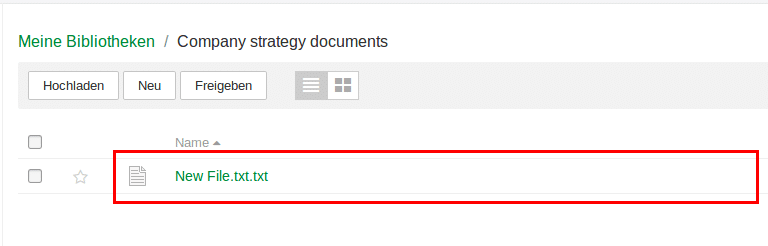
We create a new file in the previously synchronized folder „Company strategy documents“.
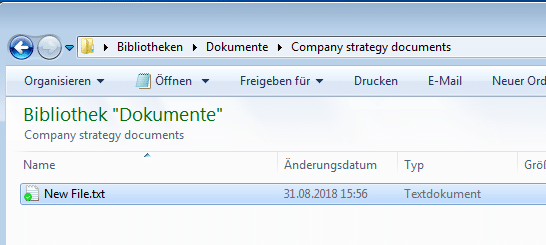
Seconds later this new file is available in the cloud and all your colleagues which have also synchronized this shared folder will see this new file in their local folder.
Stop synchronization
If you do not want a library to be synchronized with the local PC / notebook anymore, you can do so via the Seafile Client. Select the library and right-click on it.
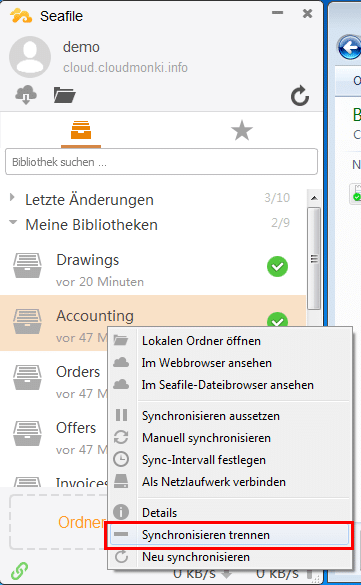
Select “Unsync”
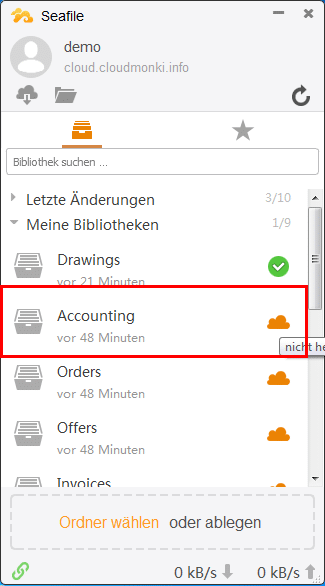
The question whether the synchronization should be terminated must be confirmed with Yes.
After that, the green synchronization icon disappears next to the library.
The folder on the local PC / notebook will remain in place, but changes from the cloud or to the cloud will no longer be considered for this folder.