Synchronize CRM events with your personal calendar
This tutorial describes how events such as meetings, calls, or tasks from Cloudmonki CRM can be synchronized with your personal calendar in the Cloudmonki Mail Server.
In order to activate the synchronization of your CRM events with your calendar, it is first necessary to create a new calendar. This calendar must have the name “CRM”. To start the calendar, log in at https://mail.my-domain.com (your webmail portal).
Switch to the Calendar area and create a new calendar there. Click on the 3 dots in the top bar and select “Add Calendar”.
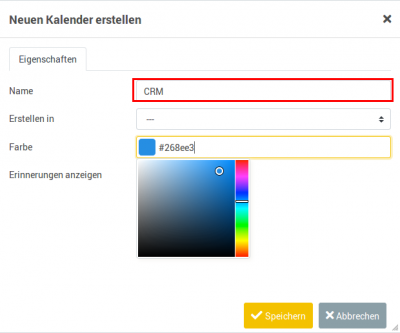
Enter “CRM” as name and assign your prefered color.
Save now. Then open the calendar settings again. To do this, select the calendar just created, click on the 3 dots in the top bar again and select “Edit”.
Click on the “Sharing” tab and then on Add.
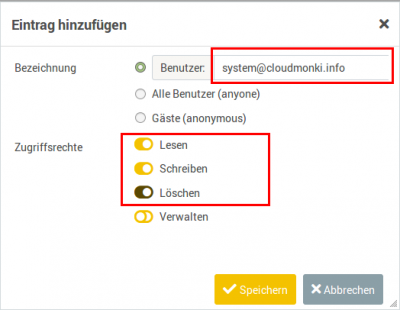
The following mask opens. Here you choose the user system@my-domain.com (change my-domain.com with your real domain) and assign permissions to read, write and delete.
Then save. That’s it! Within the next few minutes, the first events from the CRM system should appear in your new CRM calendar.
If no events are transmitted, check the instructions again, check if the events in your CRM system are in the past. Should everything be ok please contact your administrator.


