
Outlook & Calendar
Outlook and calender
Important when using multiple calendars
ATTENTION: In order to be able to use multiple calendars in Cloudmonki we do NOT recommend the Exchange protocol, but to use the IMAP protocol for integrating the emailbox. Although contacts and calendars are automatically integrated into Outlook via Exchange, it is not possible to integrate multiple calendars. So if you plan to display your colleagues’ calendars in Outlook, include your emailbox via IMAP and then follow this tutorial.
Share calendar and subscribe
If you want to include calendars of colleagues, this colleagues must first give the approval for you. See the following tutorial:
Share calendars with colleagues
After the colleague has granted the access to his calendar, you must still subscribe to the calendar, see the following tutorial:
Include one or more calendars in Outlook
So that the integration of calendars works first a small additional application must be installed, this is called “Caldav Synchronizer” and can be downloaded here.
After downloading the application, it must be installed on your PC, double click on the installation file and follow the instructions on the screen. Please consider that the app works for Outlook versions from 2007 onwards.
After the installation is finished open Outlook, you will see that there is now an additional menu named “Caldav Synchronizer”.

To start embedding calendars, click “Synchronization Profiles”
A pop-up opens, click on “Add multiple profiles”
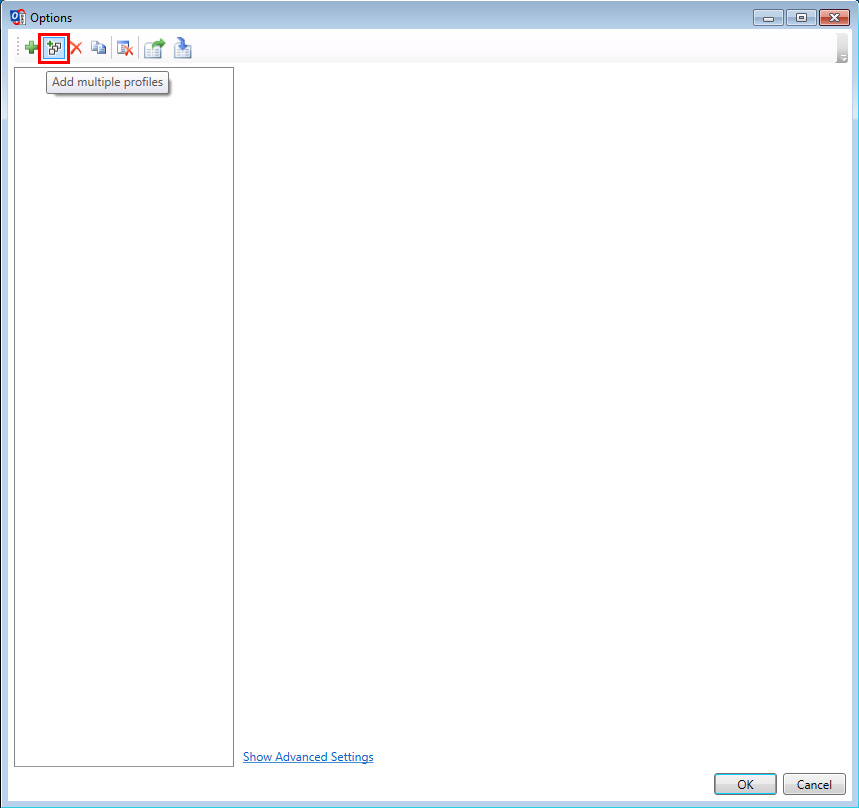
In the following screen select the default Caldav / Carddav account.
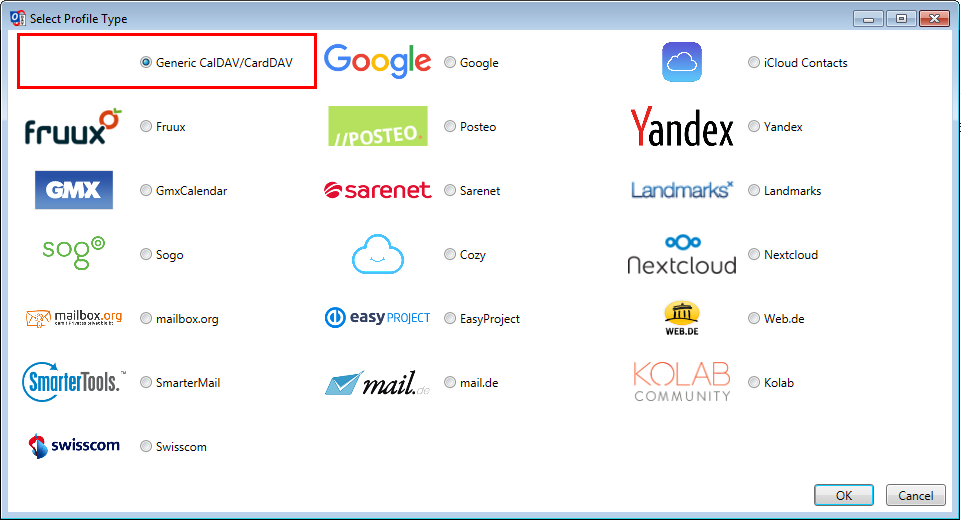
Click OK.
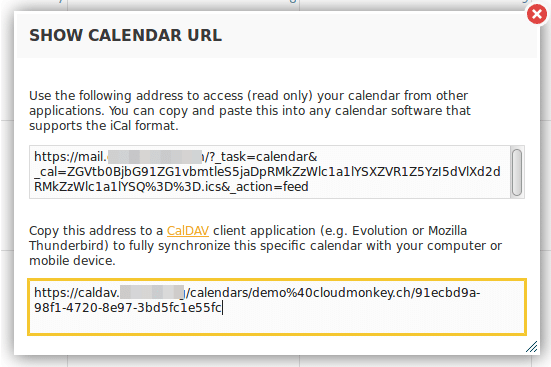
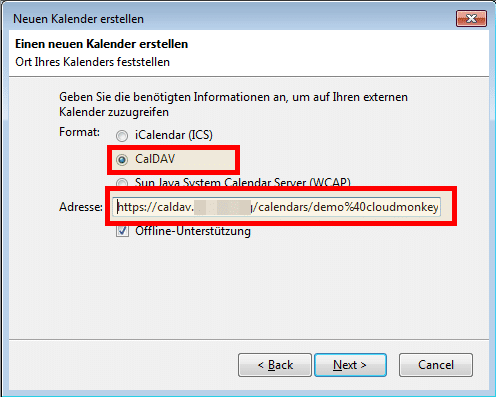
In the window that opens, enter your caldav URL, as well as your username (email address) and your password.
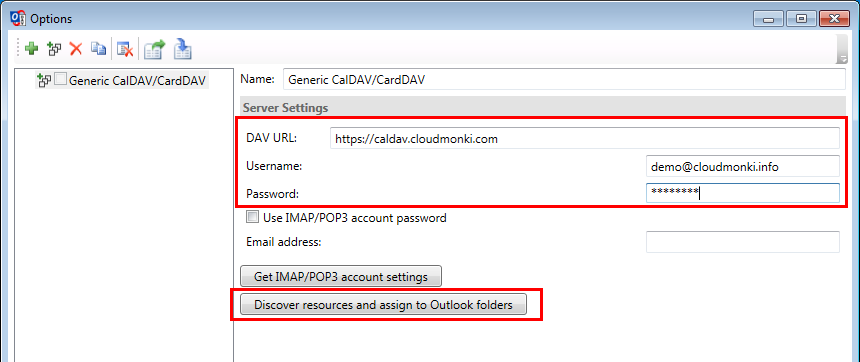
Then click on “Discover resources and assign to Outlook folders”
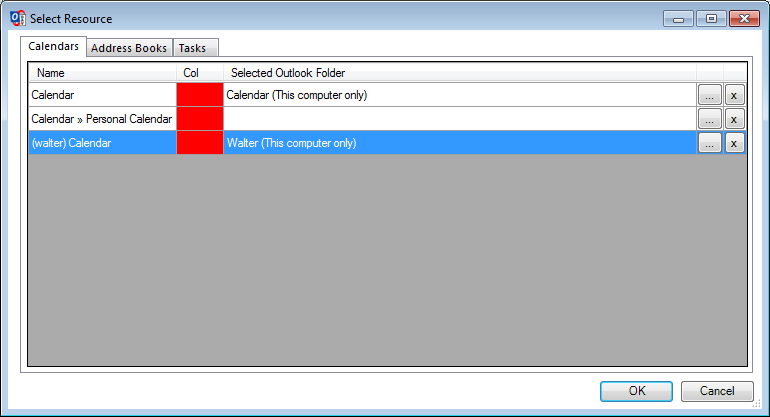
The following window opens up where all your calendars as well as all calendars which have been shared for you and which you have subscribed to are listed.
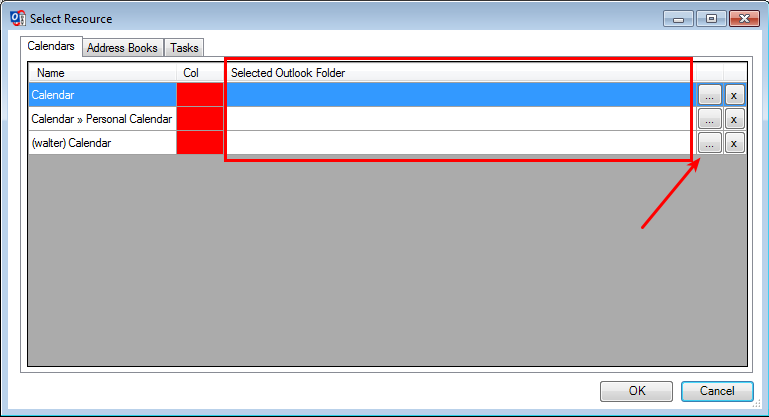
Now you have to create an Outlook calendar for each calendar. To do this, click on the button with the 3 dots.
For your personal calendar, for example select the Outlook main calendar.
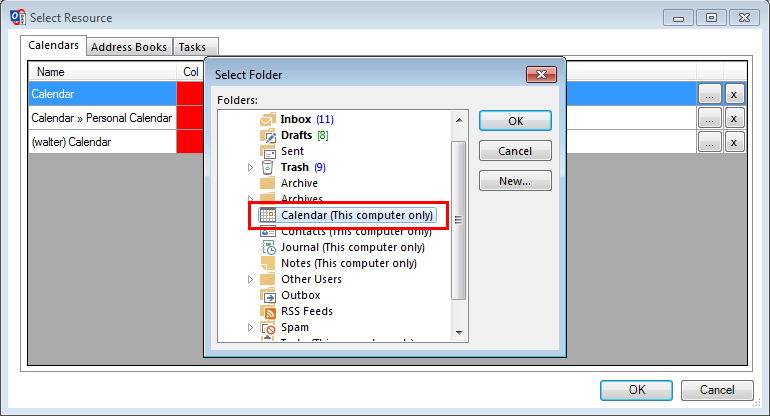
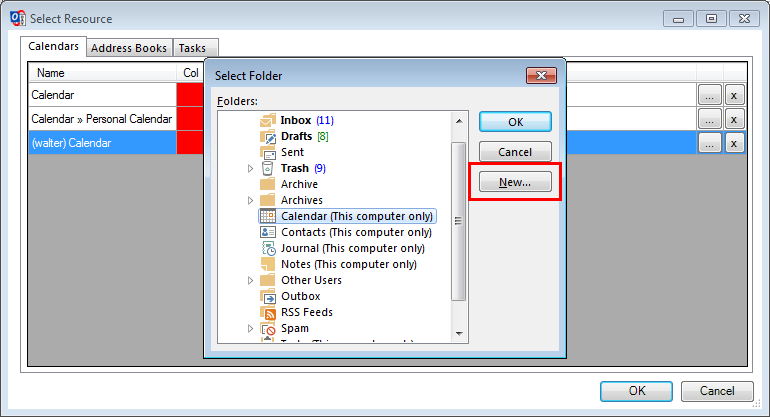
For a colleague’s shared calendar, you can create a new calendar in Outlook. Click on NEW.
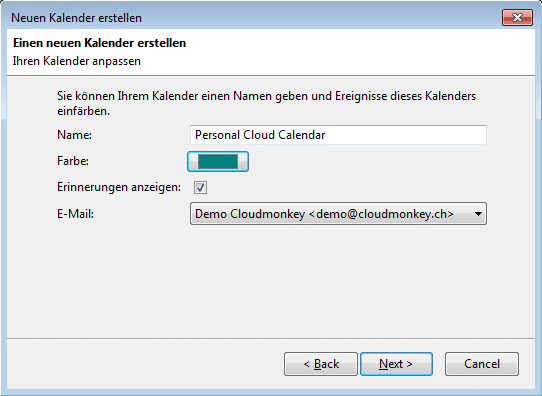
Choose a name for the new calendar, it makes sense to use the name of the colleague. Also choose that it is a calendar. Finally, define the object under which the new calendar should be created.
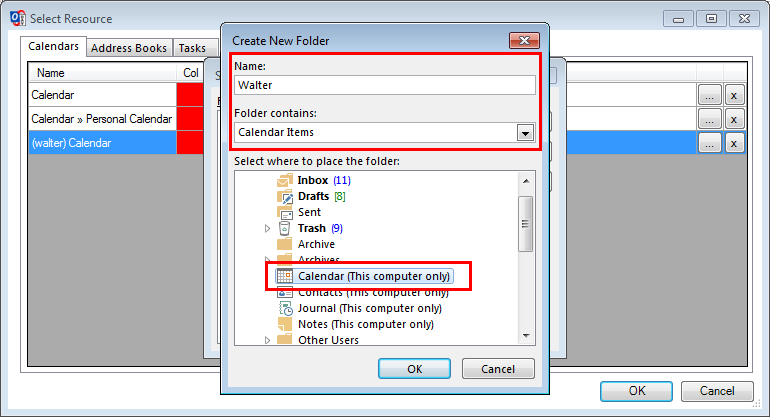
Then click on OK. The new calendar has been created.
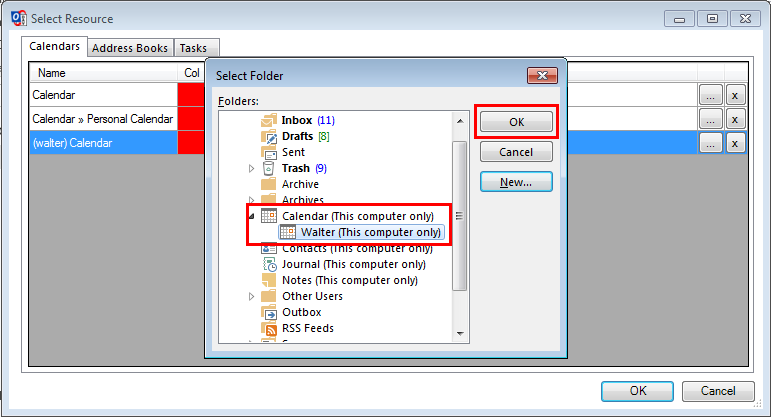
Click OK again to finish the assignment of the Outlook calendar!
Now 2 calendars will be added to Outlook.
Click OK to complete the process.
The calendars have now been included. For each calendar you could now make detailed settings such as whether the synchronization should run in both directions or the synchronization interval.
The settings can be left at the standard.

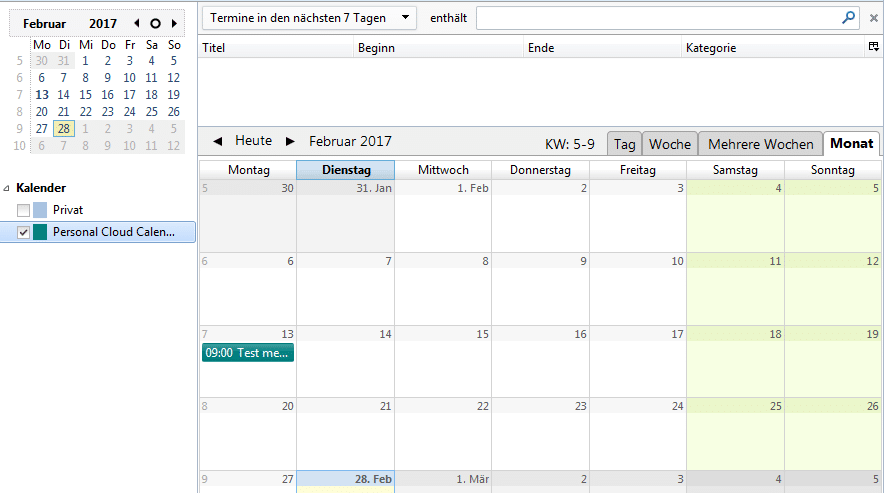
By clicking on OK, the process is definitely completed and the calendars are now available.


Recent Comments