CRM for SMEs – Cloudmonki customer relationship management
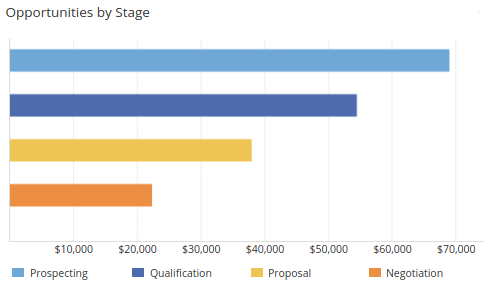
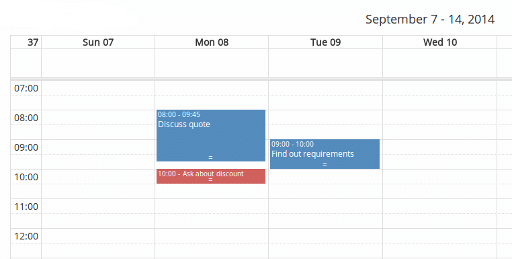
This introduction to CRM for SMEs shows you the basic functionalities of ESPO CRM. Cloudmonki is an ESPO CRM integration partner and offers you a simple and complete tool for customer contact management and customer loyalty.
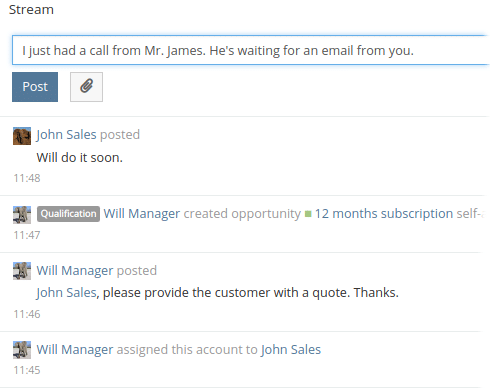
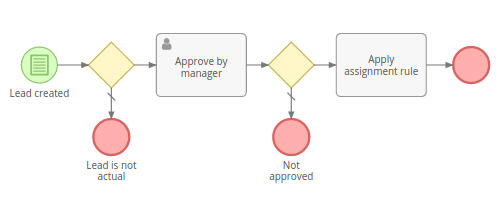
Workflows (available in Advanced Pack). Actions can be triggered when certain conditions are met. Actions available: send email, update record, create new record, create notification, assign record according to specific rules.
CRM Email Import – Customer Contact History and Archiving
This tutorial describes the CRM email import of emails from your personal mailbox and how they are automatically linked to records in CRM. In addition, the filter functionality is explained, with which you can filter which emails from your mailboxes should be considered.
Creation of the email box
Every CRM user has to carry out this activity if you want the emails of the employee to be linked to the sales opportunities, prospects etc.
PS. It is also possible to create group email accounts and assign them to a team in CRM. This allows in example a sales team import from a group email account. Each member of the CRM team has access to these emails in the CRM system and the assignment to a lead happens only once!
This article describes how to integrate a personal email account. For the integration of group email accounts, please contact your administrator.
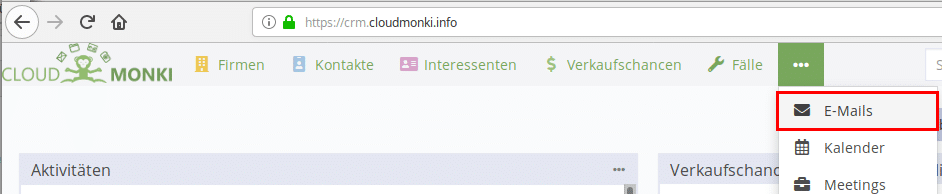
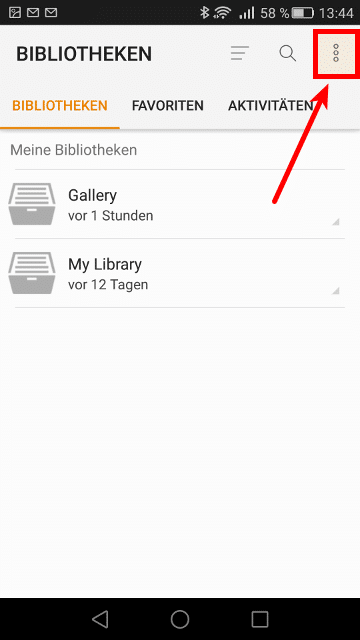
Open your CRM system via your portal or open directly the URL crm.cloudmonki.info (replace cloudmonki.info with your personal domain) and open the section E-Mails
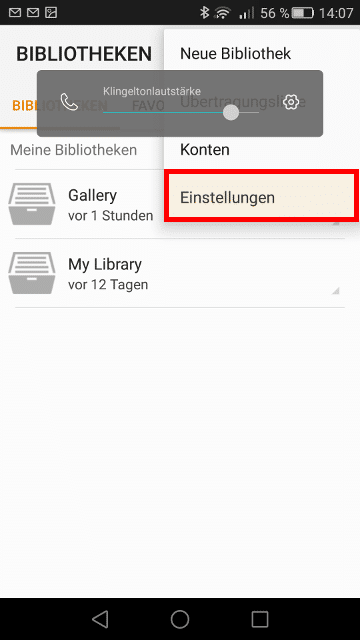
In the email module you have to choose the menu item “Personal Email Accounts” via the 3 dots.
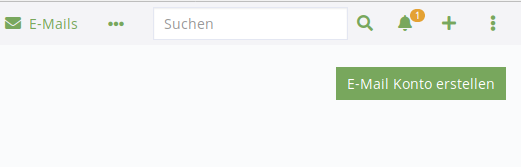
Then select “Create Email Account”
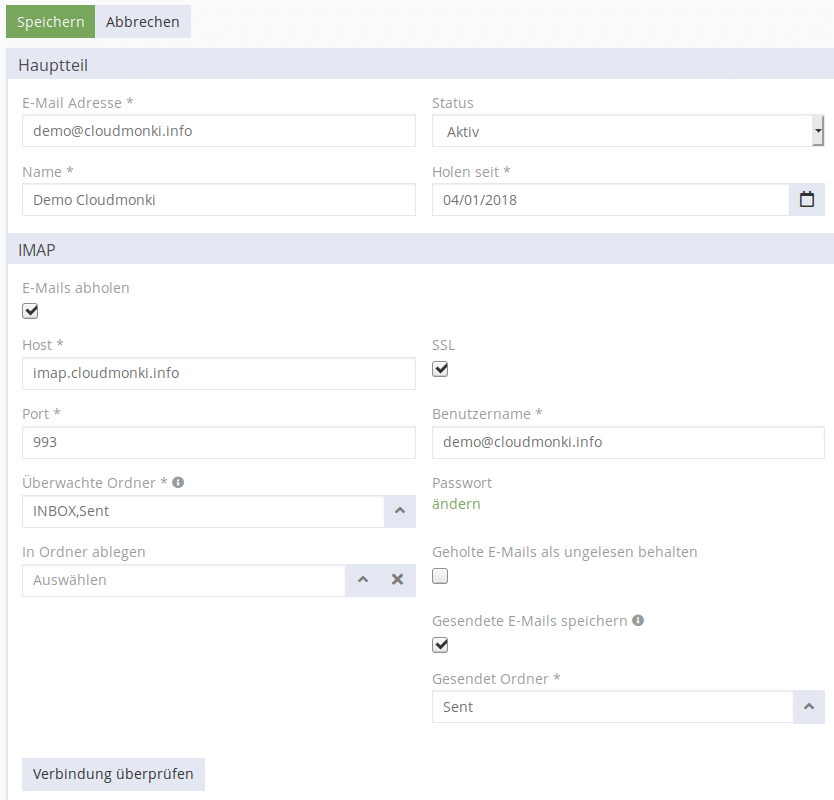
In the following mask, please define the following fields
Fill in the fields as described above with your personal Emailbox data. Replace the domain cloudmonki.info with your personal domain.
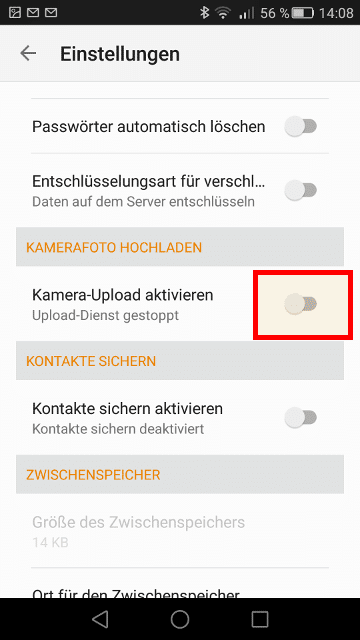
Monitored Folders: Decide which folders of your emailbox should be monitored, all new emails in the selected folders will be imported. Hint: If you want to import only customer-relevant emails into the CRM system, it makes sense to create a folder “Customers” below the inbox on your email server. Move all customer-relevant emails from the Inbox to the new “Customers” folder. Then choose here in the CRM system the import of emails from the folder “Customers”.
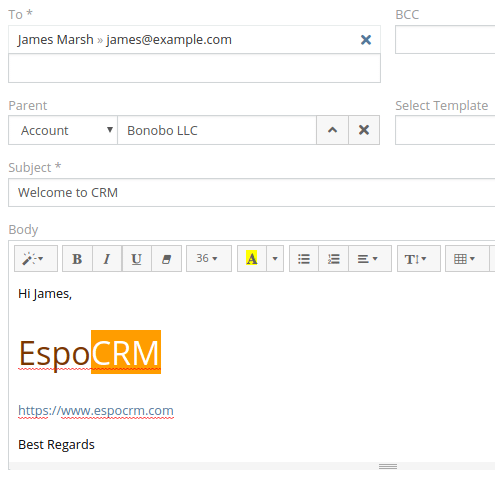
Store sent emails: Select the mailbox folder where emails should be saved when you write emails directly through the CRM system. This allows you to find the sent mail later among the sent emails in your mail client.
Once you have made all the settings, you can test the connection by clicking on “Test connection”.
If everything is OK select “Save” in the upper left corner. The import of emails should begin immediately.
The CRM system carries out an automatic allocation to sales opportunities and so on. The system compares the email addresses from the incoming emails and the email addresses that you have assigned to prospects and contacts. If the CRM Email Import does not work as desired, please contact your administrator.
Filters
Filters serve to e.g. suppress unwanted emails when importing from Email Server.
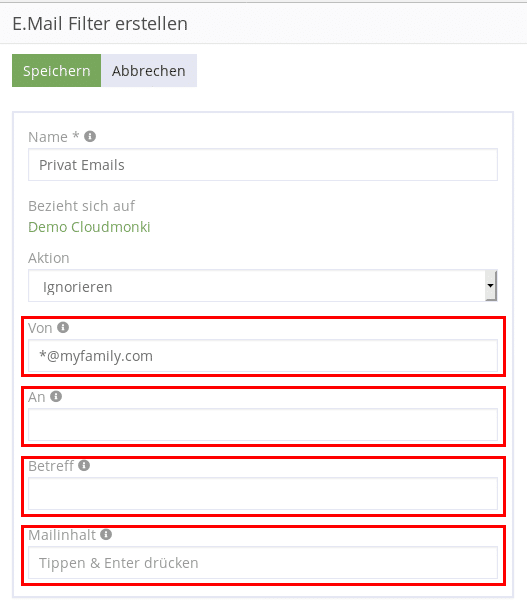
After the mailbox has been created in CRM, filters can be created. Click on the plus sign in the “Filter” section.
In the following mask you can define which contents should be checked.
From: Mails from these senders are not imported.
To: Mails to these recipients are not imported.
Subject: Mails with the specified subject will not be imported.
Body contains: Mails with the specified content will not be imported.
Remember: Wildcards with * are also possible in each case, like e.g. *@myfamily.com considers all email addresses of the domain myfamily.com.
Synchronize CRM events with your personal calendar
This tutorial describes how events such as meetings, calls, or tasks from Cloudmonki CRM can be synchronized with your personal calendar in the Cloudmonki Mail Server.
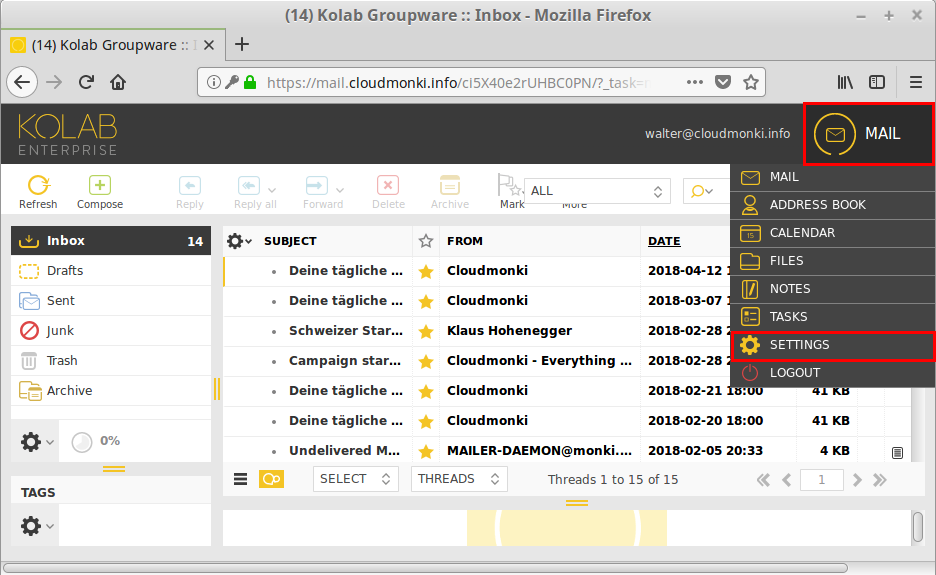
In order to activate the synchronization of your CRM events with your calendar, it is first necessary to create a new calendar. This calendar must have the name “CRM”. To start the calendar, log in at https://mail.my-domain.com (your webmail portal).
Switch to the Calendar area and create a new calendar there. Click on the 3 dots in the top bar and select “Add Calendar”.
Enter “CRM” as name and assign your prefered color.
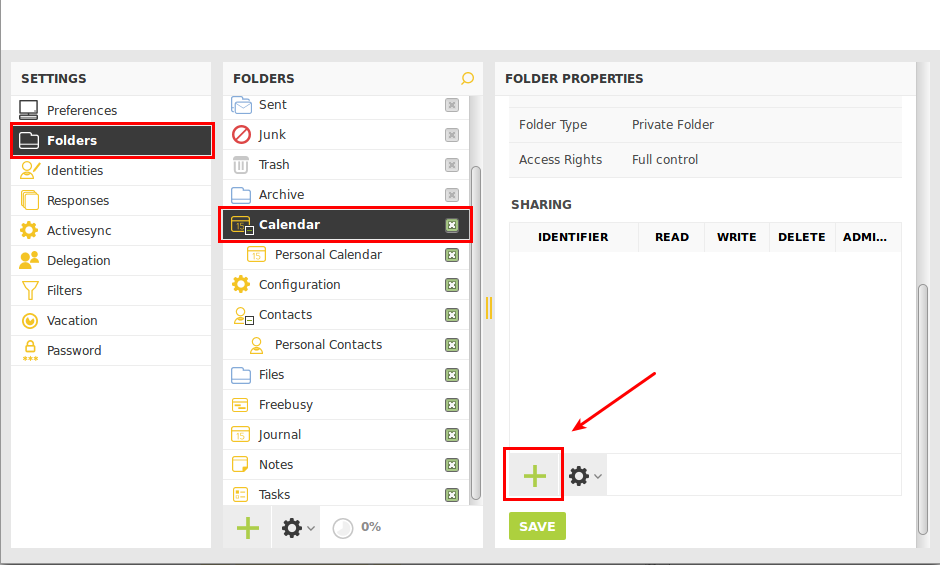
Save now. Then open the calendar settings again. To do this, select the calendar just created, click on the 3 dots in the top bar again and select “Edit”.
Click on the “Sharing” tab and then on Add.
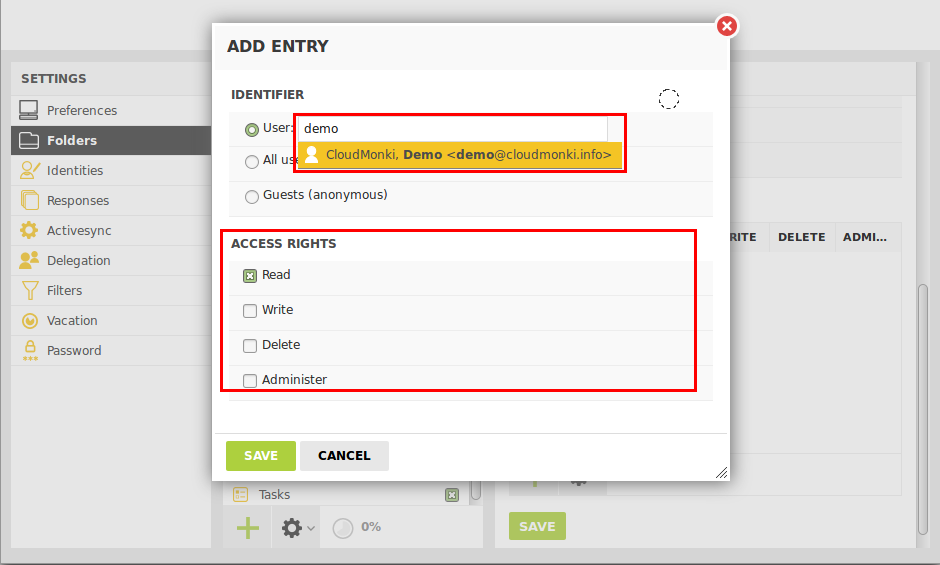
The following mask opens. Here you choose the user system@my-domain.com (change my-domain.com with your real domain) and assign permissions to read, write and delete.
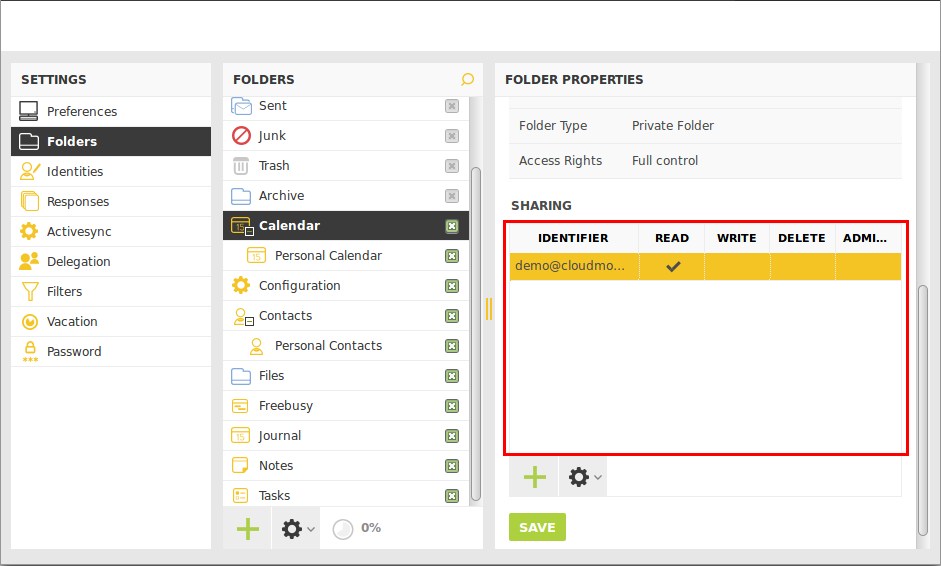
Then save. That’s it! Within the next few minutes, the first events from the CRM system should appear in your new CRM calendar.
If no events are transmitted, check the instructions again, check if the events in your CRM system are in the past. Should everything be ok please contact your administrator.
Synchronization of cloud data with local PC/laptop
This tutorial describes how to synchronize Libraries from your cloud with your local PC/laptop. Further it will explain how to upload and synchronize local folders with your private cloud.
Download of cloud libraries
Over the cloud webinterface it’s possible to administer your Libraries. You can created new libraries and upload data into this new created libraries. How it works is described HERE.
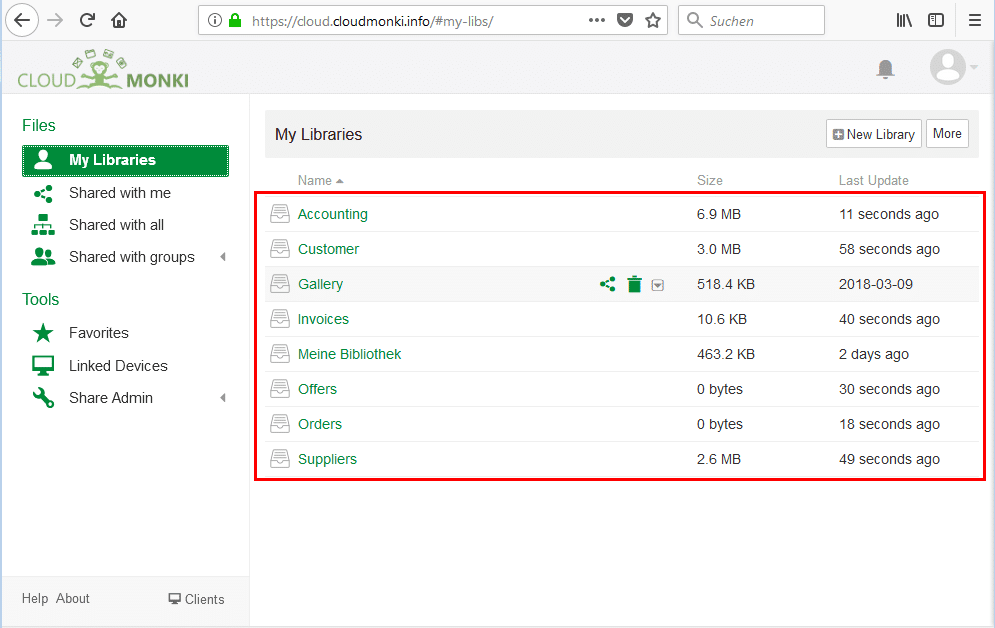
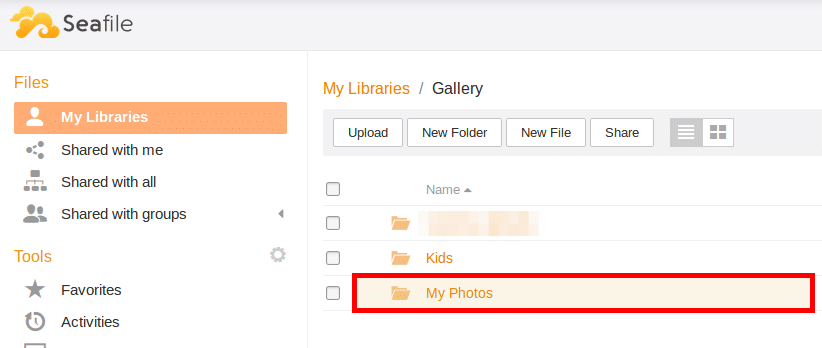
We suppose we have already a library structure, similar to that:
In the cloud some library already existing. Now we start synchronizing one of them with the local PC/laptop.
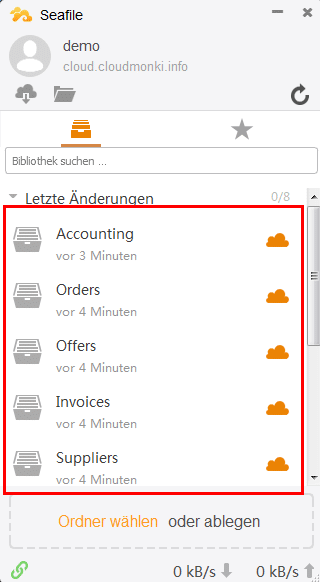
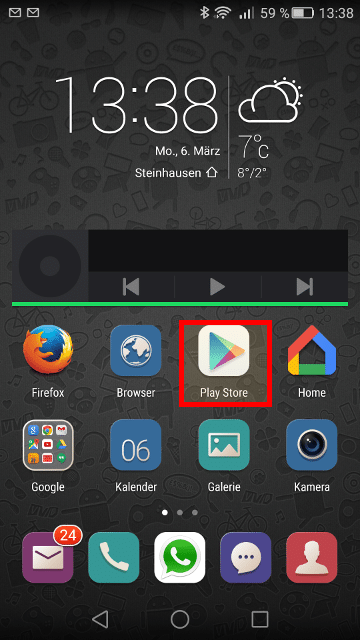
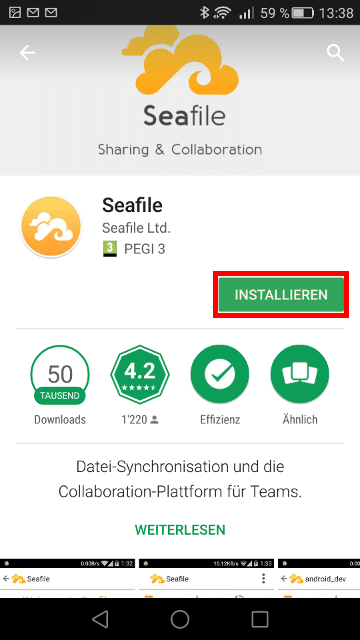
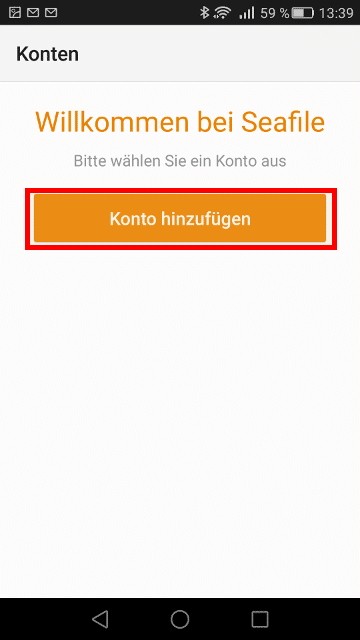
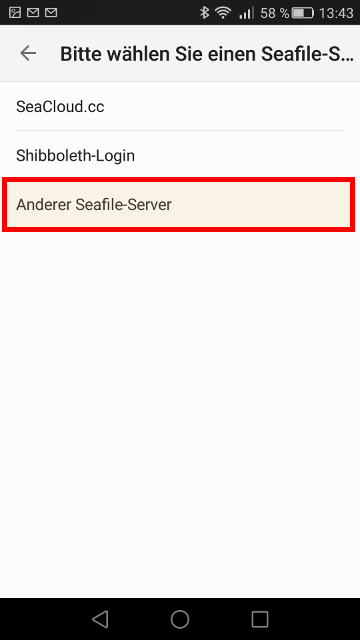
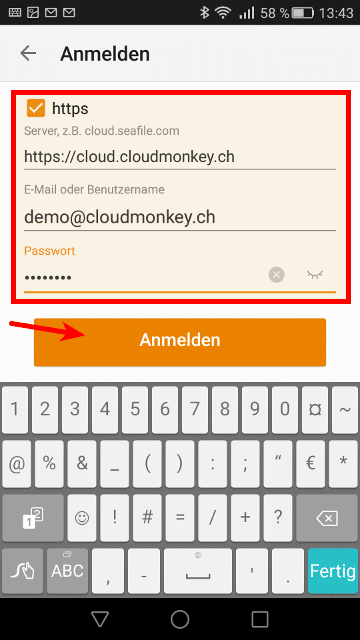
To start open the Seafile Synchronization Client. How this is installed on your device please read HERE.
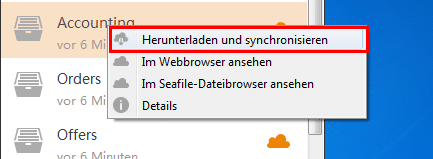
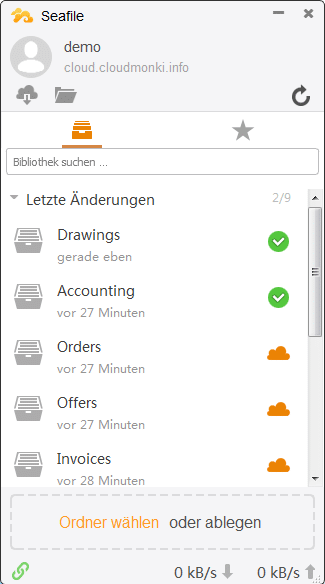
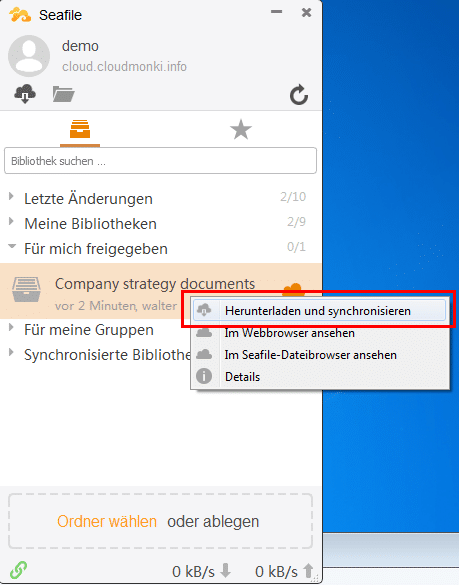
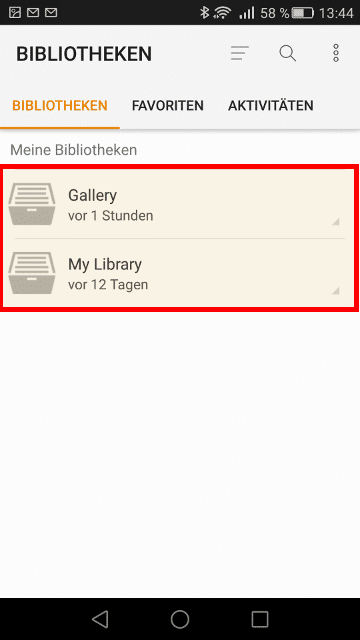
In the data section of the Seafile Client you find the same structure of libraries like in the webclient. On the right of each library you find an orange cloud icon, which tells us that no one of this libraries is synced with the local PC/laptop.
Now we synchronize one of this libraries.
Therefore select the library, lets say “Accounting” and click right on it. It will appear following menu:
Chosse “Sync this library”.
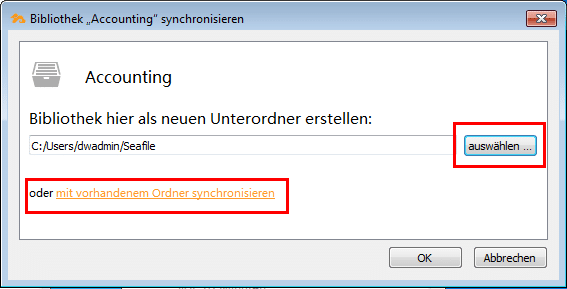
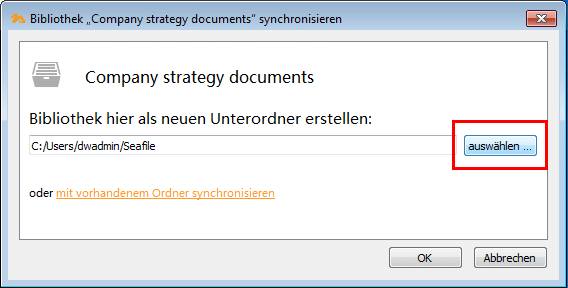
Now a popup will appear. Here you have to choose the location where the library should end up when synchronized:
There are two options available: You can select the location where the library folder should be created (New folder with then name of the library will be created).
Second option is to select an already existing folder (Used for example when a similar folder with similar data is existing on the local PC/laptop).
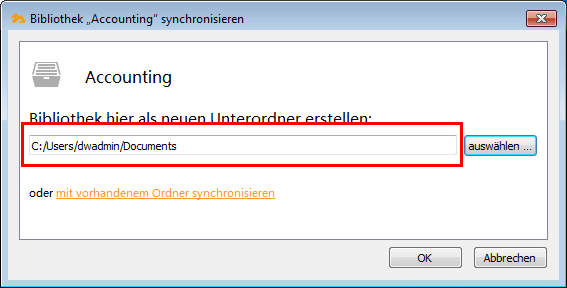
Choose new folder:
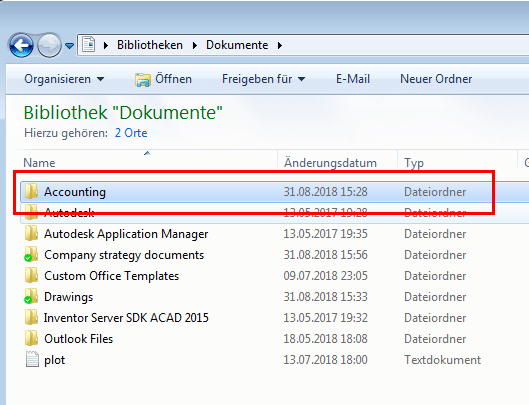
Click on “Choose” and choose the path where the library folder should be created.
In this case the following folder will be created: C:/Users/dwadmin/Documents/Accounting. In it the entire content of the library „Accounting“ will be downloaded and synchronized.
Confirm with OK, the synchronization starts. Please wait until is finished, based on the amount of data can take some time.
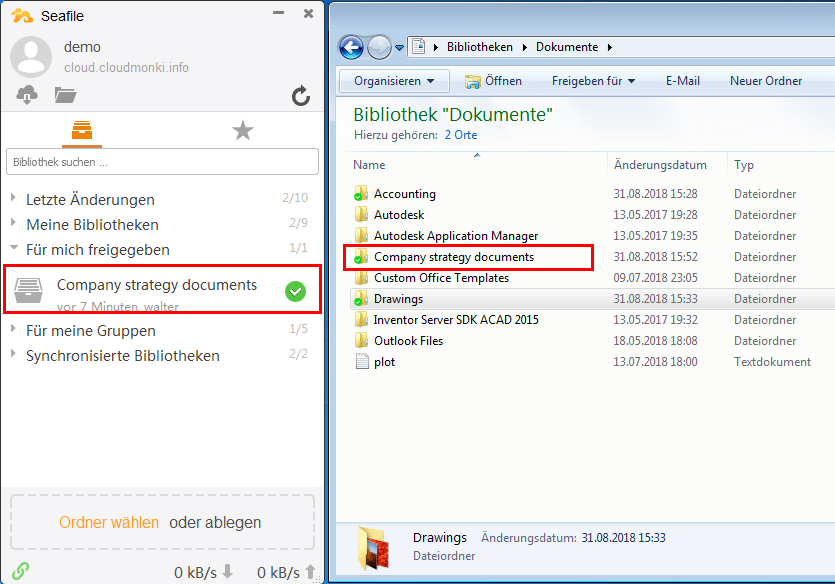
When the synchronization is over a green icon will appear next to the synchronized library. This means synchronization with local PC/laptop ended successfully.
Upload of local stored folders and creation of new libraries
It is also possible to upload and synchronize local stored folders. In this case for each folder a new library will be created in the cloud.
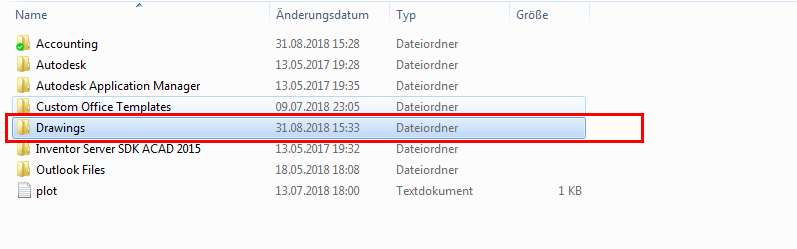
Lets assume we want to upload and synchronize the local folder „Drawings“ with our private cloud.
It is really simple, the only thing to do is to drag and drop the folder into the Seafile client.
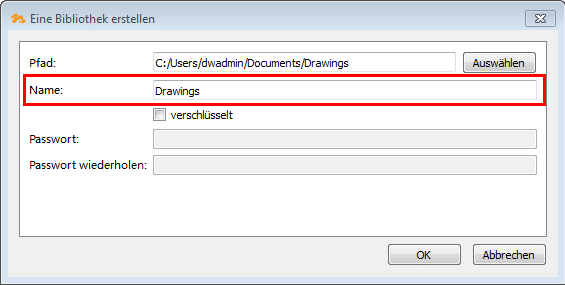
The following popup opens:
Select the name of the library which will be created in the cloud. As default the same name as the selected folder will be proposed.
Additionally you can decide to encrypt the new library. If activated you have to define a password for the the encryption. (Pay attention: Don’t forget the selected password, otherwise you will loose your data because it is not possible to decrypt the data without password).
Confirm with OK.
After the synchronization the new library is available in the seafile client and is marked as synchronized.
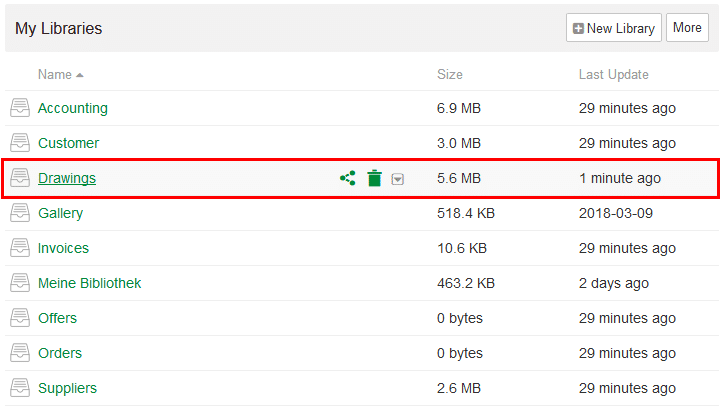
And also in the webclient the library is available.
Synchronization of shared libraries
The Cloudmonki cloud makes it possible to share libraries with other people working in the same organization. When someone of your colleagues has shared a library with you, you even can synchronize this library with your local PC/laptop.
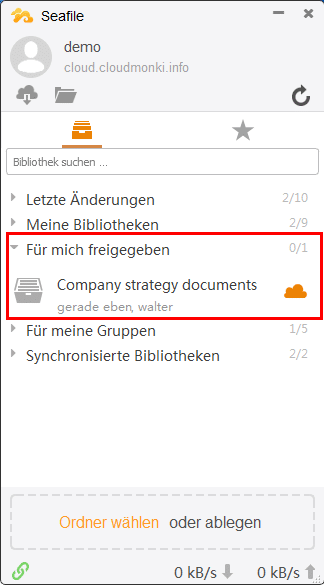
You can find this shared libraries in the section “Shared with me”.
The synchronization of this folders works in the same way as already described above.
Select library, Right click!
Choose „Sync this library“.
Click “Choose”.
Choose where the new library folder should be created.
Confirm with OK.
The shared library is now available as synchronized folder on your PC/notebook.
Synchronization of changes and new files
Notice:
Each change on local files in synchronized folders will be synchronized with the cloud.
All newly created files in synchronized folders will be synchronized with the cloud.
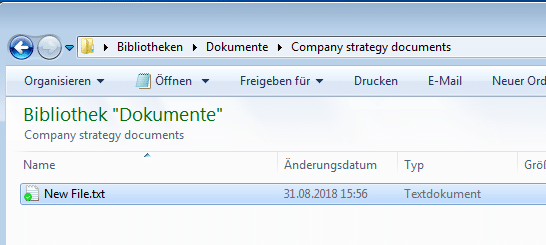
Example:
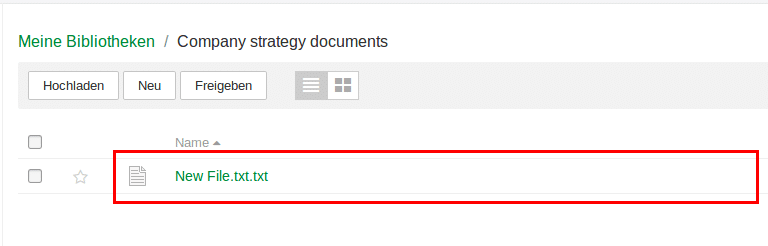
We create a new file in the previously synchronized folder „Company strategy documents“.
Seconds later this new file is available in the cloud and all your colleagues which have also synchronized this shared folder will see this new file in their local folder.
Stop synchronization
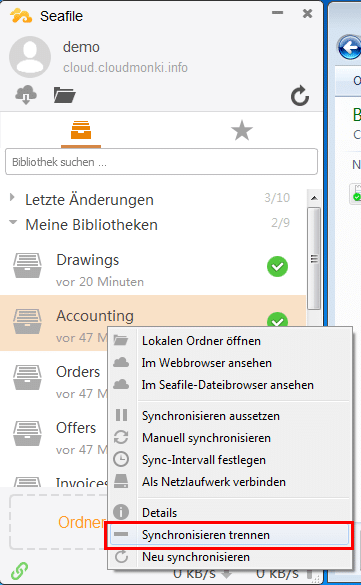
If you do not want a library to be synchronized with the local PC / notebook anymore, you can do so via the Seafile Client.Select the library and right-click on it.
Select “Unsync”
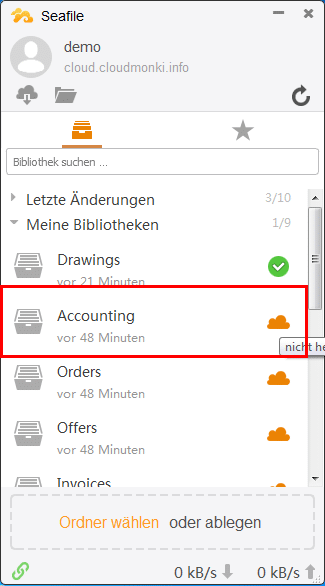
The question whether the synchronization should be terminated must be confirmed with Yes.
After that, the green synchronization icon disappears next to the library.
The folder on the local PC / notebook will remain in place, but changes from the cloud or to the cloud will no longer be considered for this folder.
ATTENTION: In order to be able to use multiple calendars in Cloudmonki we do NOT recommend the Exchange protocol, but to use the IMAP protocol for integrating the emailbox. Although contacts and calendars are automatically integrated into Outlook via Exchange, it is not possible to integrate multiple calendars. So if you plan to display your colleagues’ calendars in Outlook, include your emailbox via IMAP and then follow this tutorial.
Include contacts in Outlook
In order for the integration of contacts to work, a small additional application must first be installed, this is called “Caldav Synchronizer” and can be downloaded here.
After downloading the application, it must be installed on your PC, double click on the installation file and follow the instructions on the screen. Please consider that the app works for Outlook versions from 2007 onwards.
After the installation is finished open Outlook, you will see that there is now an additional menu named “Caldav Synchronizer”.
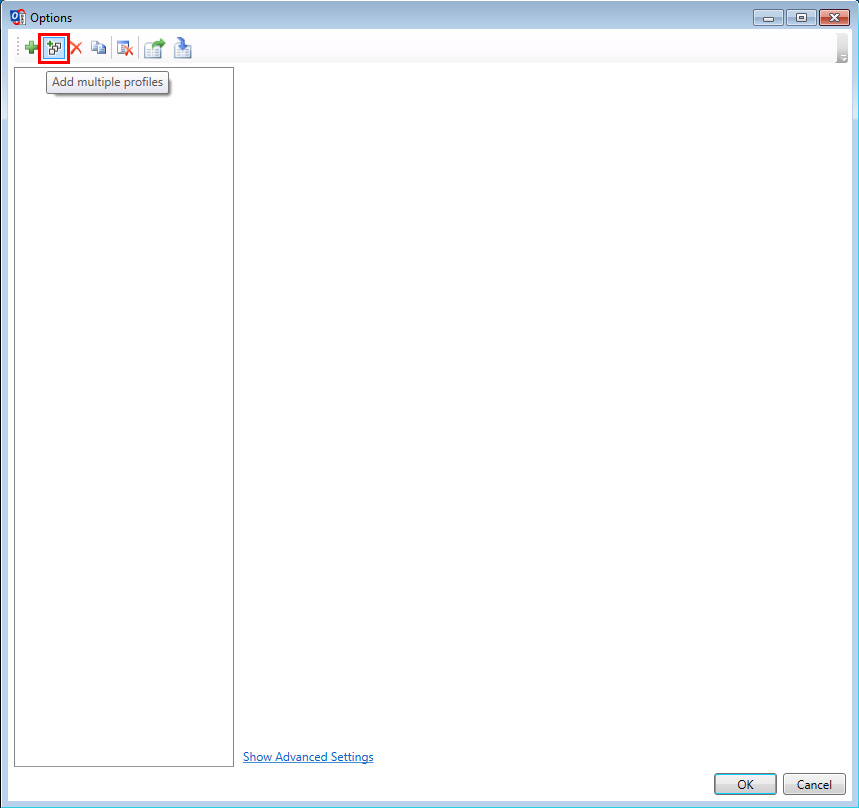
To start integrating contacts, click on “Synchronization Profiles”
A pop-up opens, click on “Add multiple profiles”
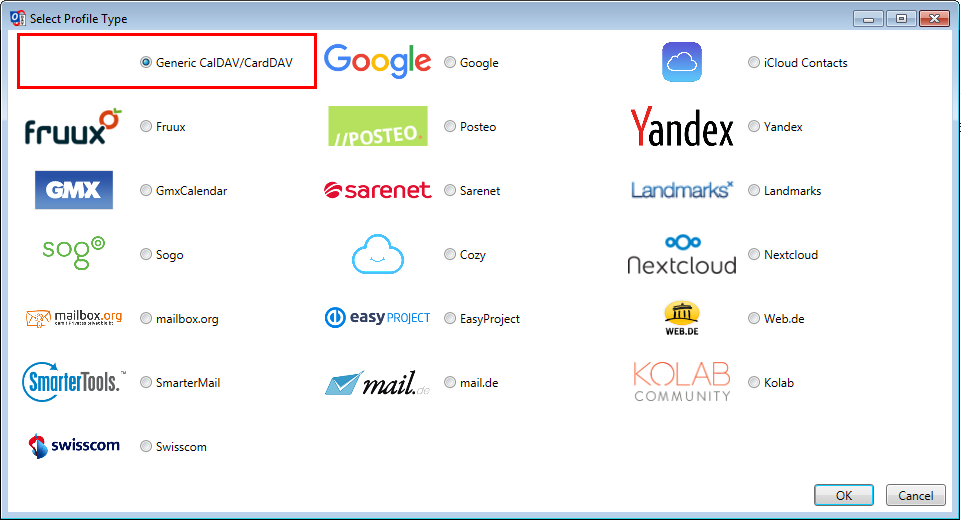
In the following screen select the default Caldav / Carddav account.
Click OK.
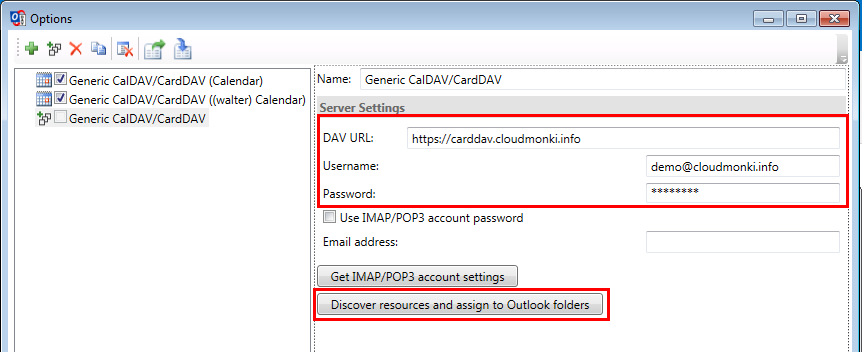
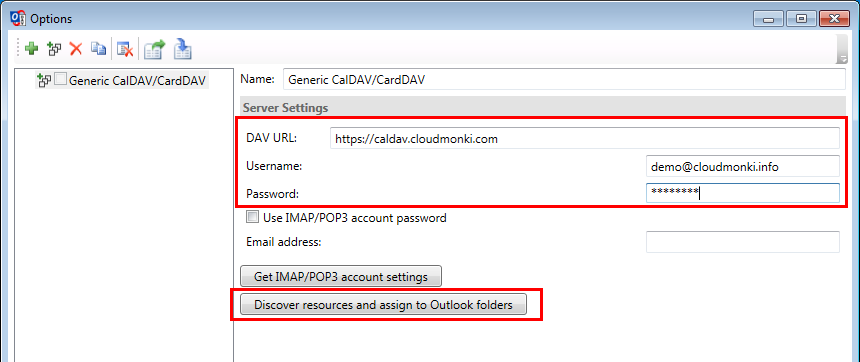
In the window that opens, enter your CARDDAV URL, as well as your username (email address) and your password.
Then click on “Discover resources and assign to Outlook folders”
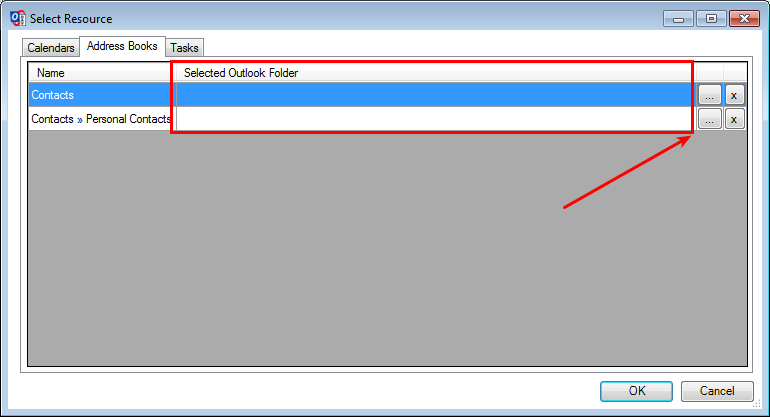
It opens the following window where all your address books and all address books are listed which have been approved for you and you have subscribed to. Therefore switch to the tab “Address Books”
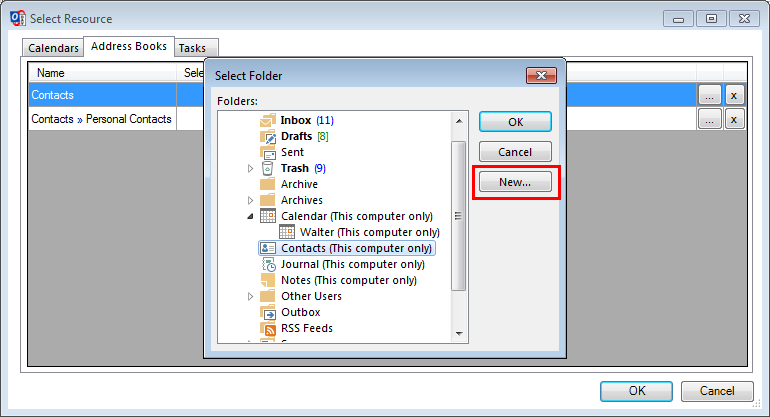
Now you have to assign or create an Outlook address book for each address book you want to use.To do this, click on the button with the 3 dots.
For your personal address book e.g.select the Outlook main address book.
For a shared address book from a colleague, you can create a new address book in Outlook. Click on NEW.
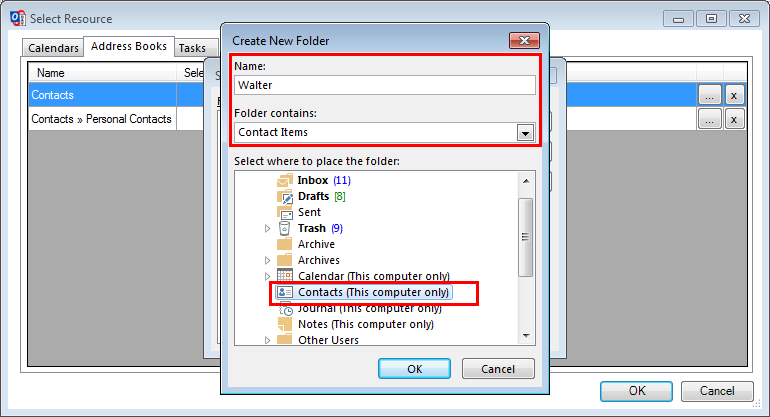
Choose a name for the new address book, it makes sense to use the name of the colleague. Also choose that it is an address book. Finally, define the object under which the new address book should be created.
Then click on OK. The new address book has been created.
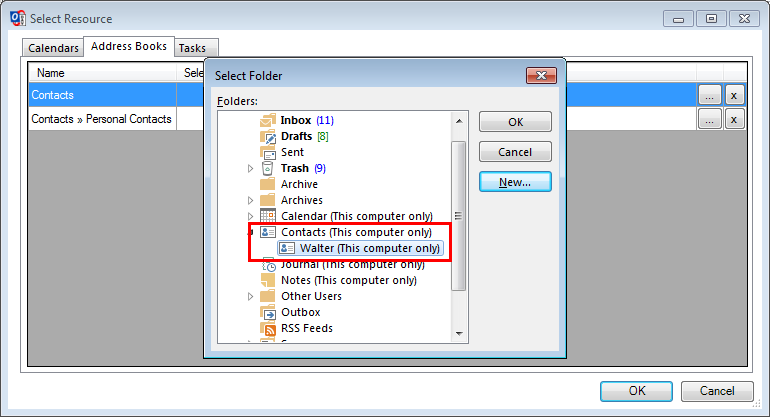
Click OK again to finish the assignment of the Outlook address book!
This example adds 1 address book to Outlook.
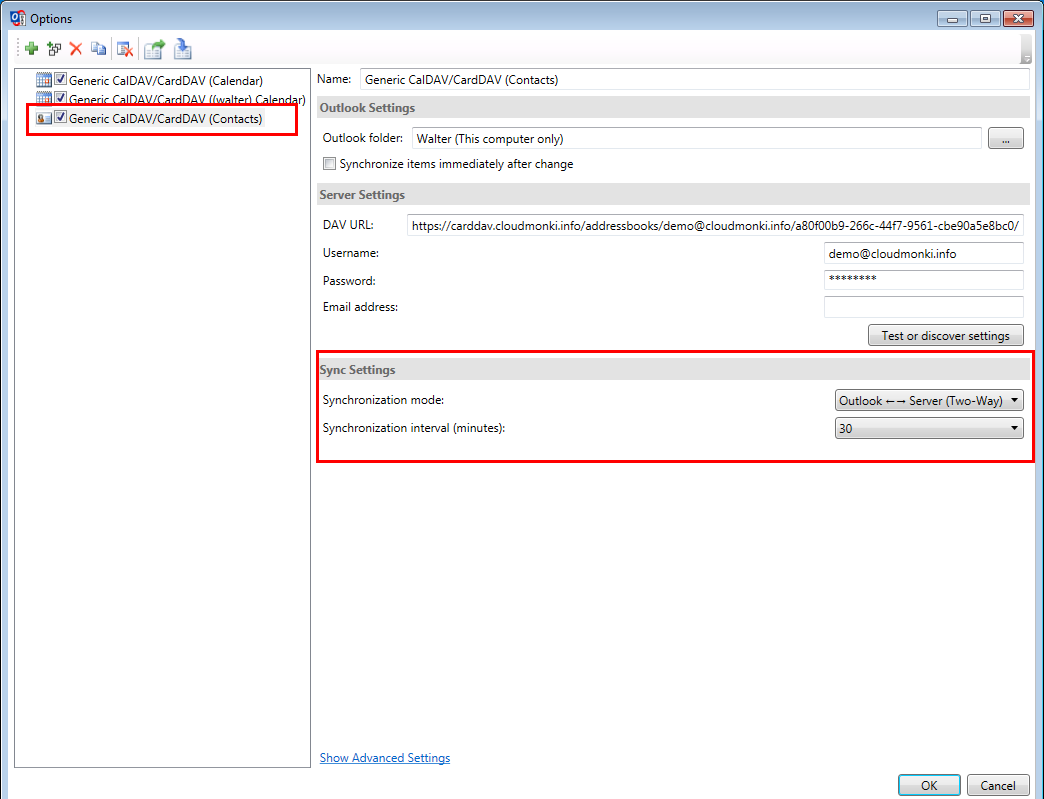
Click OK to complete the process.
The address book has now been integrated, for each address book you could now make detailed settings such as z. whether the synchronization should run in both directions or the synchronization interval.
The settings can be left at the standard.
By clicking on OK, the process is definitely completed and the address books are now available.
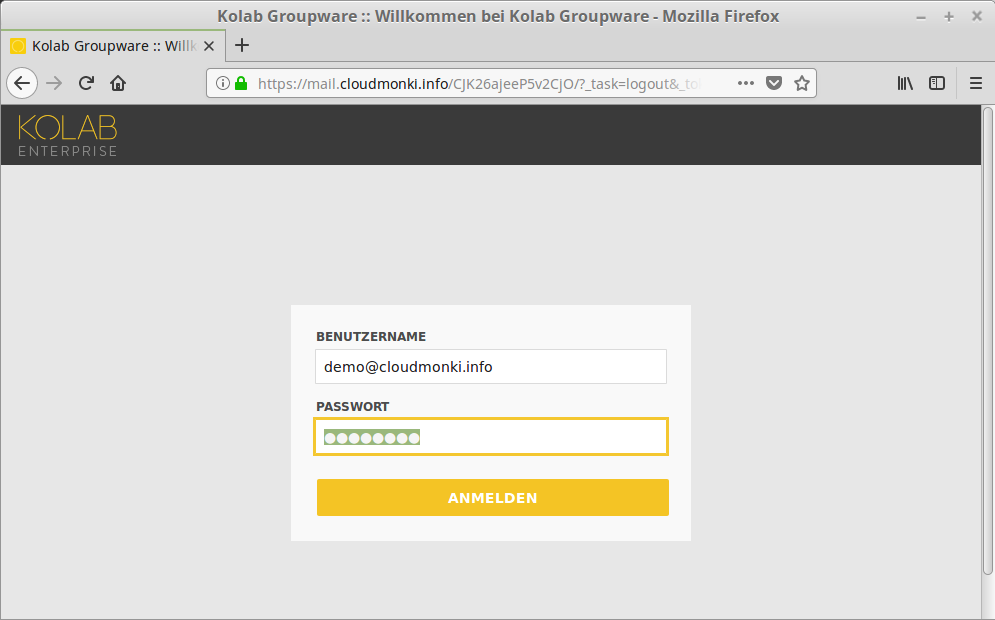
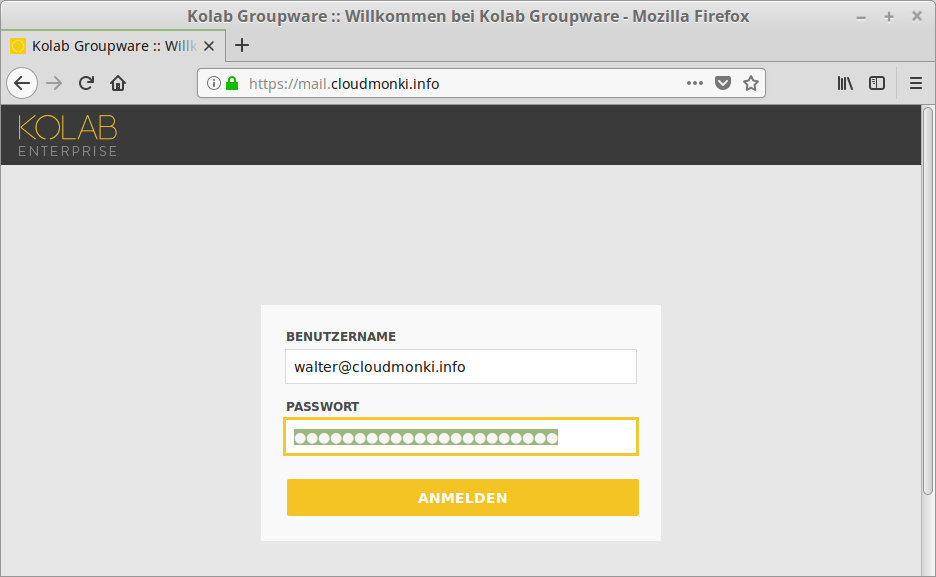
Once a colleague has shared his calendar with you, you must first subscribe to it before you can view the calendar. First log in to the webmail.
Enter username (email address) and password and click on “Login”.
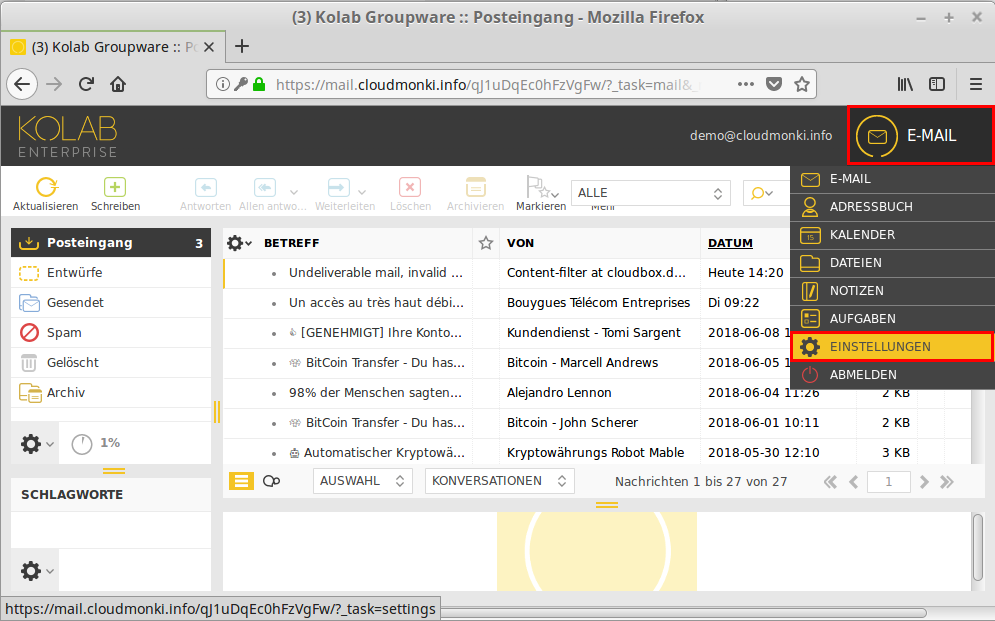
In the menu, select Settings
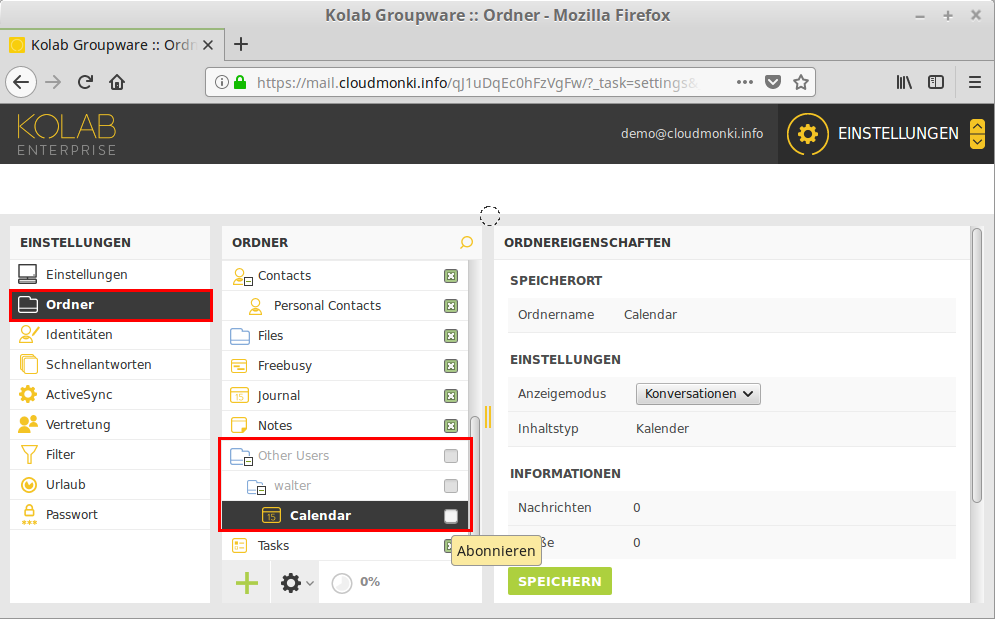
Arrived in the settings in the left menu select the entry “Folder”. In the tab “Folder” next to it choose the area “Other Users” and activate all calendars you want to subscribe to.
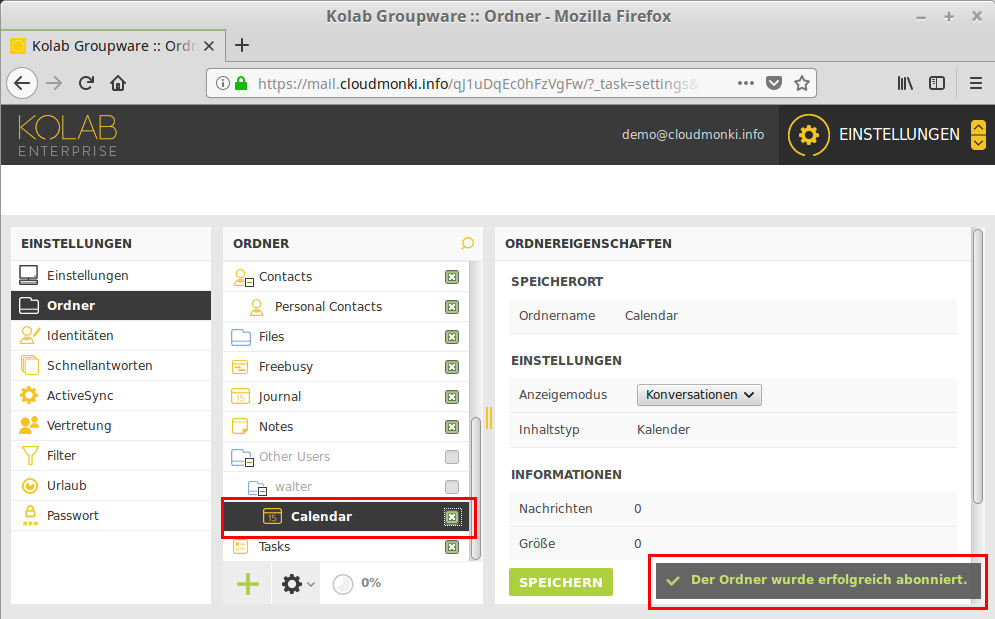
Activate the checkbox by clicking on it. You will receive a corresponding success message.
Repeat this for all calendars you want to include later in the webmail calendar or in Thunderbird or Outlook.
ATTENTION: In order to be able to use multiple calendars in Cloudmonki we do NOT recommend the Exchange protocol, but to use the IMAP protocol for integrating the emailbox. Although contacts and calendars are automatically integrated into Outlook via Exchange, it is not possible to integrate multiple calendars. So if you plan to display your colleagues’ calendars in Outlook, include your emailbox via IMAP and then follow this tutorial.
Share calendar and subscribe
If you want to include calendars of colleagues, this colleagues must first give the approval for you.See the following tutorial:
So that the integration of calendars works first a small additional application must be installed, this is called “Caldav Synchronizer” and can be downloaded here.
After downloading the application, it must be installed on your PC, double click on the installation file and follow the instructions on the screen.Please consider that the app works for Outlook versions from 2007 onwards.
After the installation is finished open Outlook, you will see that there is now an additional menu named “Caldav Synchronizer”.
To start embedding calendars, click “Synchronization Profiles”
A pop-up opens, click on “Add multiple profiles”
In the following screen select the default Caldav / Carddav account.
Click OK.
In the window that opens, enter your caldav URL, as well as your username (email address) and your password.
Then click on “Discover resources and assign to Outlook folders”
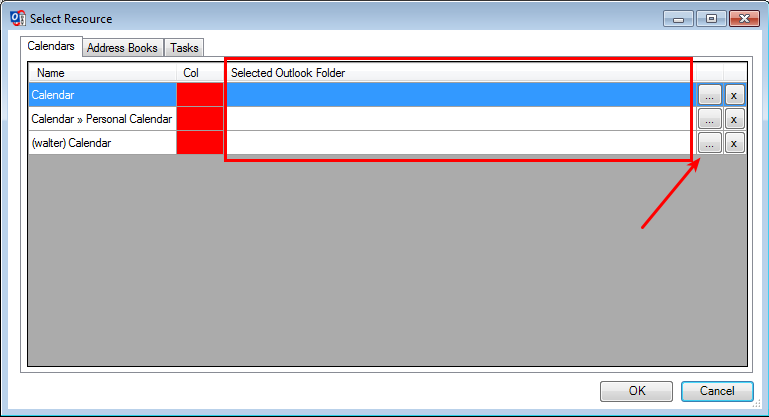
The following window opens up where all your calendars as well as all calendars which have been shared for you and which you have subscribed to are listed.
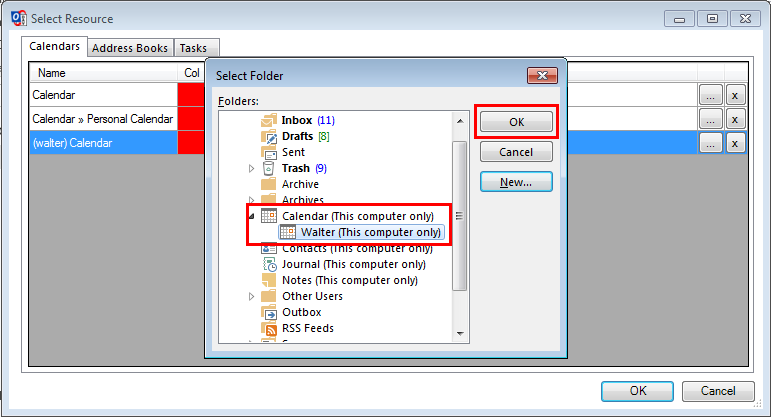
Now you have to create an Outlook calendar for each calendar.To do this, click on the button with the 3 dots.
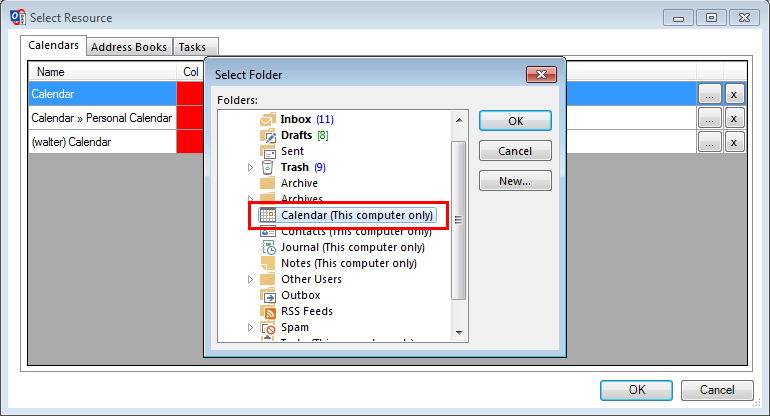
For your personal calendar, for example select the Outlook main calendar.
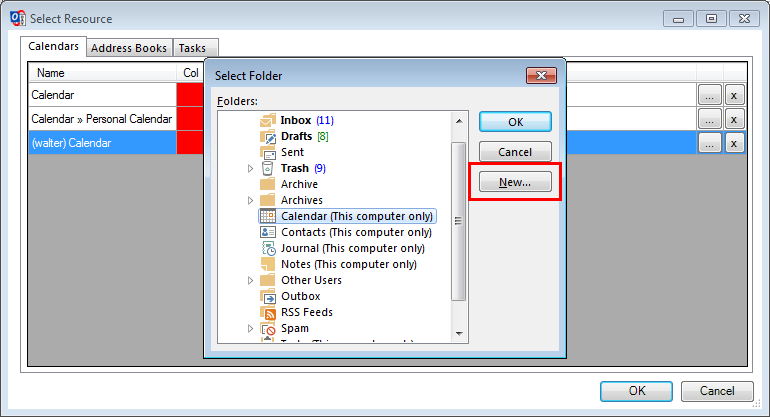
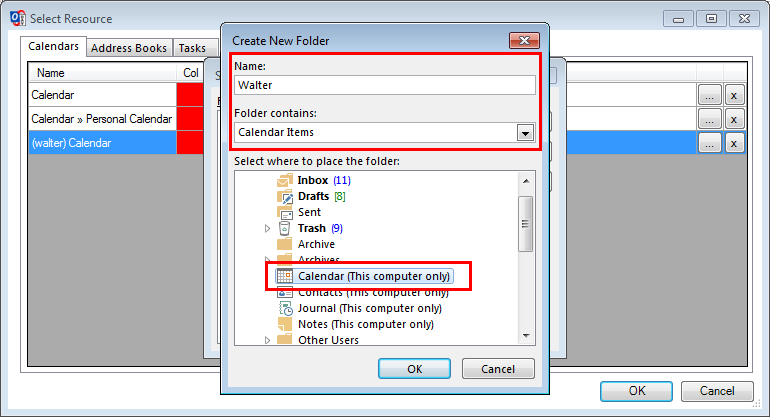
For a colleague’s shared calendar, you can create a new calendar in Outlook. Click on NEW.
Choose a name for the new calendar, it makes sense to use the name of the colleague. Also choose that it is a calendar. Finally, define the object under which the new calendar should be created.
Then click on OK. The new calendar has been created.
Click OK again to finish the assignment of the Outlook calendar!
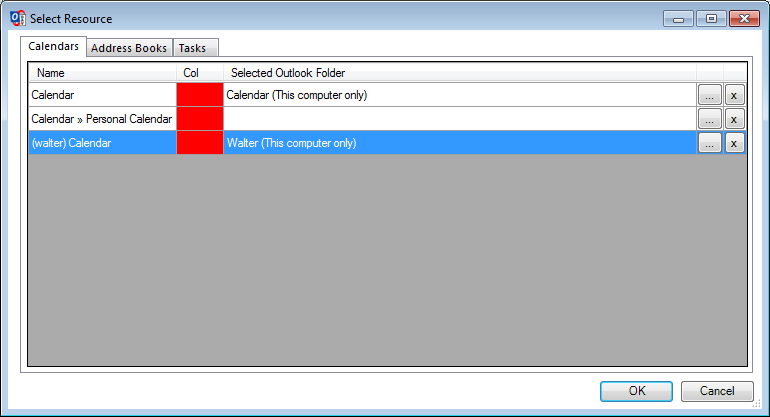
Now 2 calendars will be added to Outlook.
Click OK to complete the process.
The calendars have now been included. For each calendar you could now make detailed settings such as whether the synchronization should run in both directions or the synchronization interval.
The settings can be left at the standard.
By clicking on OK, the process is definitely completed and the calendars are now available.
This tutorial describes how to share your calendar with colleagues inside your company.
The sharing of calendars can only be done via webmail, it is not possible to share his calendar via Outlook or Thunderbird. Thus, the first thing to do is to log in to the webmail.
Enter your username and password and click Login.
Then select the settings via the menu
In the settings, select on the left menu entry “Folder” in the tab “Folder” then select the calendar you want to share and then click in the right window on the PLUS sign
Here now select which employees should get access to your calendar.If you give at least 3 letters, all employees will be listed who have the given letters in the name.
You can also choose whether the selected colleague should receive only reading rights or writing rights on your calendar.After you have made the settings complete the procedure by clicking on “Save”.
Now the calender share appears in the list
The release was granted. Repeat this for all colleagues who should get access to your calendar.
Then, the one to whom you have shared the calendar can add your calendar in his Outlook or Thunderbird, see the following tutorials about:
Wir stellen Business-Software für Klein- und mittelständische Betriebe zur Verfügung. CloudMonki ist eine Sammlung dieser Applikationen, mit der du schnell und unkompliziert eine eigene Cloud dein Eigen nennen kannst. Wir helfen dir, die richtige Lösung für dich zu finden, richten deine Cloud ein und stellen dir Anleitungen zur Verfügung, damit du schnell mit allen Apps zurecht kommst. Weiters beraten wir dich in puncto Webhosting und Design sowie Business-Applikationen. Du möchtest eine maßgeschneiderte Lösung? Dann kontaktiere uns unverbindlich. We supply business software to SMEs and CloudMonki is a bundle of these apps which enables you to have your own personal cloud. We will help you to find the right solution for you, and provide set up instructions to install your cloud. We can also advise on webhosting and design and if you require a tailor made solution then contact us with no obligation.
Contact
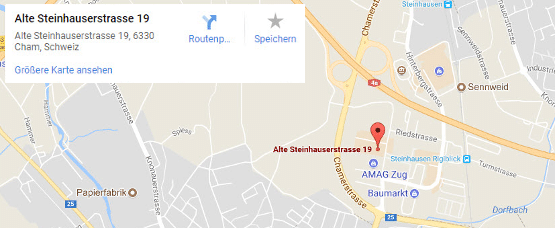
Alte Steinhauser Straße 19, 6330 Cham (CH)
Bitte verwende unser Kontaktformular / Please use our contact form
+41 044 586 20 23
+41 044 586 20 23
Standort
This website uses cookies to provide the best possible functionality. Diese Website nutzt Cookies, um bestmögliche Funktionalität bieten zu können. Cookie settingsACCEPT